


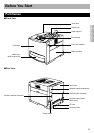
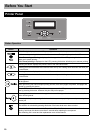
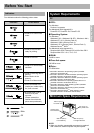

Settings and Printing
19
NOTES:
•
If using the
Network
interface cable, be sure to connect
the printer with a network interface cable and to turn it on.
•
If using the
Parallel
or
USB
interface cable, be sure to turn
off the printer or not to connect the printer with an interface
cable to avoid the Plug and Play installation.
■ For Windows
There are the following two methods to install the printer
driver for Windows.
• Automated Driver Installation
• Custom Driver Installation
This Setup Guide only briefly explains Automated Driver
Installation. For detailed instructions, refer to the
Installation section.
NOTE:
• For Windows NT 4.0, Windows 2000, Windows XP and
Windows Server 2003, make sure to log on as an
administrator.
1
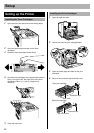
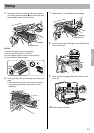
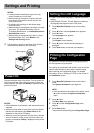
Insert the printer CD-ROM into the CD-ROM drive.
The CD-ROM launches automatically.
NOTE:
• If the CD-ROM does not launch automatically,
perform the following steps (1) - (2).
(1) Double-click the My computer icon.
(Windows XP / Windows Server 2003: Start -
My Computer)
(2) Double-click the CD-ROM icon.
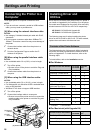
2 Click Install Printer Driver.
3 Click Automated Driver Installation.
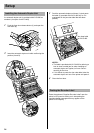
The License Agreement window is displayed.
4 Click [Yes].
The Printer port selection window is displayed.
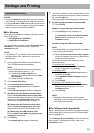
5 [A] When using the Network interface cable:
Click on Select the Network port for KX-CL400
check button, and select the printer of the IP Address
confirmed on the Configuration Page (refer to
“Printing the Configuration Page” on page 17).
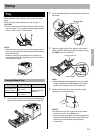
[B] When using the Parallel interface cable:
Click on Select an existing printer port check
button, and click on the LPT port (Example: LPT1).
[C] When using the USB interface cable:
Click on Install via the USB port (plug and play
installation) check button.
6 Click [Next>].
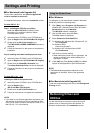
The Installed Options window is displayed.
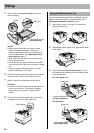
7 Click on the check box of the installed options in your
printer and select the total memory from the Memory
list, and click [Next >].
The setup program starts installing the printer driver.
8 [A] When using the Network interface cable:
(1) Click [Finish].
[B] When using the Parallel interface cable:
(1) Click [Finish] and turn the printer on.
If the Welcome to the Found New Hardware
Wizard window is displayed, refer to the
Installation section.
[C] When using the USB interface cable:
NOTE:
• For Windows 98, only Windows 98 SE is available
when using a USB interface.
(1) When the Connect the printer to the computer
window is displayed, connect the USB interface
cable and turn the printer on.
Perform the following steps depending on the
operating system:
For Windows 98 / Windows Me:
(2) When the InstallShield Wizard Complete
window is displayed, click [Finish].
For Windows 2000:
(2) If the Digital Signature Not Found window is
displayed, click [Yes].
The InstallShield Wizard Complete window is
displayed.
(3) Click [Finish].
For Windows XP / Windows Server 2003:
(2) If the Welcome to the Found New Hardware
Wizard window is displayed, refer to the
Installation section.
(3) Click [Finish].
NOTE:
• Restarting of the computer may be required
depending on your computer environment. In this
case, restart your computer.
■ For Windows (with Upgrade Kit)
When installing the printer driver for the printer equipped
with the Upgrade Kit, use the printer CD-ROM provided
with the Upgrade Kit.
The Automated Driver Installation is the same with the
above steps. For detailed instructions, refer to the
Installation section.
Installing Printer Driver
Settings and Printing