


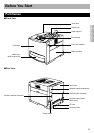
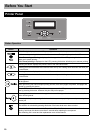
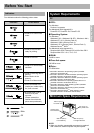
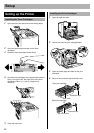
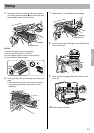
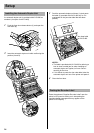
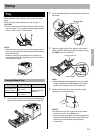
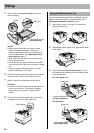

Settings and Printing
20
■ For Macintosh (with Upgrade Kit)
To print from a Macintosh, the optional Upgrade Kit
must be installed in the printer.
For detailed instructions, refer to the Installation section.
For Mac OS 8.6 - 9.2
Step 1: Installing the PPD file and utilities
Install the KX-CL410 PPD (PostScript Printer
Description) file, and then install the Adobe
PostScript printer driver.
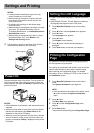
1 Insert the printer CD-ROM in your CD-ROM drive.
2
Open the
English
folder (
KX-CL410:Mac OS: English
).
3 Double-click the KX-CL410 Installer icon.
The END-USER LICENSE AGREEMENT window is
displayed.
4 Follow the instruction on the screen to complete the
installation.
Step 2: Installing the Adobe PostScript printer driver
1 Insert the printer CD-ROM in your CD-ROM drive.
2
Open the
English
folder (
KX-CL410:Mac OS: English
).
3 Double-click the AdobePS 8.8 Installer icon.
The Adobe PostScript Driver window is displayed.
4 Follow the instruction on the screen to complete the
installation.
For Mac OS X 10.1 - 10.3
Installing the PPD file and printer driver
1 Insert the printer CD-ROM in your CD-ROM drive.
2
Open the
English
folder
(KX-CL410:Mac OS X:English).
3 Double-click the KX-CL410 Installer icon.
4 Follow the instructions to complete the installation.
NOTE:
• If you want to print Classic application documents, you
are required to install the KX-CL410 software for Mac
OS 9.2, then set the computer and printer. Refer to "For
Mac OS 8.6 - 9.2" in this section.
■ For Windows
For example, to print a document created in Microsoft
WordPad, perform the following steps.
1 Click [Start], select Programs (All Programs for
Windows XP / Windows Server 2003) and select
Accessories, then click WordPad.
The WordPad window is displayed.
2 Click the File menu, then click Print....
The Print window is displayed.
3 Select Panasonic KX-CL400 PCL6.
4 For Windows 98 / Windows Me / Windows NT 4.0:
Click Properties.
For Windows 2000:
Proceed to the step 5.
For Windows XP / Windows Server 2003:
Click Preferences.
5 Click a tab to set each setting.
• When setting the printer from an application, the
setting is returned to the default setting if the
application is closed.
6 (Click [OK] and) Click [Print] or [OK] in the Print
window of the application to print the document.
NOTE:
• The Print window appearance depends on the
application for Windows. Refer to the application
manual.
■ For Macintosh (with Upgrade Kit)
To set the computer and printer, refer to the Settings and
Printing section.
For the instructions to remove the printer driver and
utilities, refer to “Removing Driver and Utilities” for
Windows or Macintosh in the Installation section.
Using the Printer Driver
Removing Driver and
Utilities