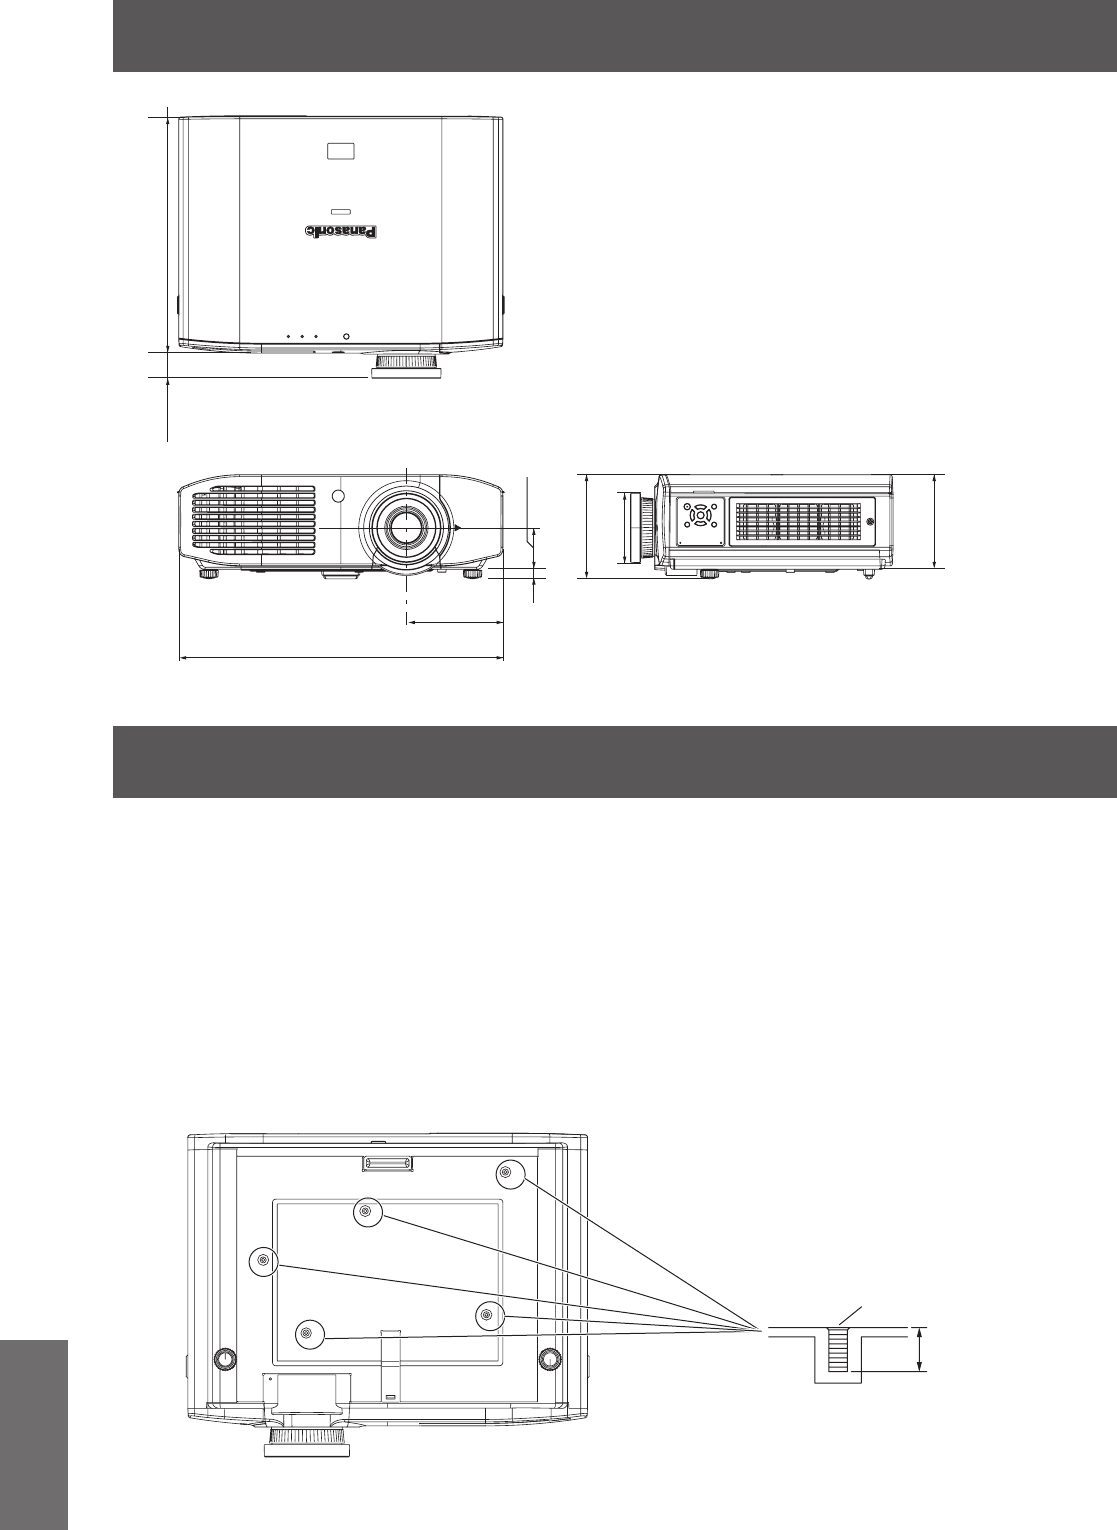
Dimensions
120 - ENGLISH
Appendix
Dimensions
z
When installing the projector to a ceiling, be sure to use the specied ceiling mount bracket (ET-PKA110H: for
high ceilings, ET-PKA110S: for low ceilings).
z
Installation work of the ceiling mount bracket should only be performed by a qualied technician.
z
Panasonic takes no responsibility for any damage to the projector resulting from use of a ceiling mount bracket
not manufactured by Panasonic or the inappropriate choice of location for installation, even if the warranty
period of the projector has not expired.
z
An unused ceiling mount bracket must be removed promptly by a qualied technician.
z
Use a torque screwdriver or Allen torque wrench to tighten bolts to their specied tightening torques. Do not
use tools such as electric screwdrivers or impact screwdrivers.
z
For details, read the installation manual that comes with the ceiling mount bracket.
z
The part numbers of accessories and separately sold components are subject to change without notice.
%RWWRPYLHZ
(73.$6IRUORZFHLOLQJV
+ROHVIRUFHLOLQJPRXQWEUDFNHW
DWWDFKPHQWVFUHZV
7RUTXH1ÂP
0[
PP
0RGHO1RRIFHLOLQJPRXQWEUDFNHW (73.$+IRUKLJKFHLOLQJV
Ceiling mount bracket safeguards
470 (18-1/2")
140 (5-1/2")
60 (2-3/8")
14 (9/16")
345 (13-19/32")35 (1-3/8")
151 (5-15/16")
100 (3-15/16")
137 (5-13/32")
<Unit: mm>


