TC6015OI Rev. AB 3/01 2001
Monarch Marking Systems, Inc. All rights reserved.
OPERATING
INSTRUCTIONS
Use these operating instructions with
your Monarch
6015 Printer. The
printer works with the Symbol
SPT
1500 or the Palm III
series of
organizers. With these Palm
Computing
connected organizers, the
printer can print receipts for retail,
health care, or industrial environments.
Palm Computing is a subsidiary of
3Com
Corporation.
The printer can print text, bar codes,
and some limited graphics on thermal
direct receipt paper.
Use these instructions to
♦ connect the printer
♦ load supplies
♦ replace the batteries
♦ clean the printhead.
The printer comes packaged with two
rolls of supply (one already loaded in
the printer). Batteries are not included.
Programming Information
You may need to refer to the
Programmer's Manual available from
our Web site or in a printed version by
ordering part number TC6015PM. It
provides an explanation of how to use
the printer's command language.
Refer to the Symbol Web site
(www.symbol.com) for the Symbol
Application Programming Interface
(API) documentation. Refer to the
3Com
/Palm Computing Web site
(www.palm.com) for more information
about the Palm III
series of
organizers.
Powering the Printer
The printer is powered by four (4) AA
batteries (not included). To replace the
batteries, see "Replacing the Batteries."
You can also use the optional AC power
adapter. The adapter must be
purchased separately.
Rechargeable batteries are preferred
over alkaline batteries.
If using the optional power adapter,
plug the connector into the socket.
Plug the other end of the cable into a
grounded electrical outlet.
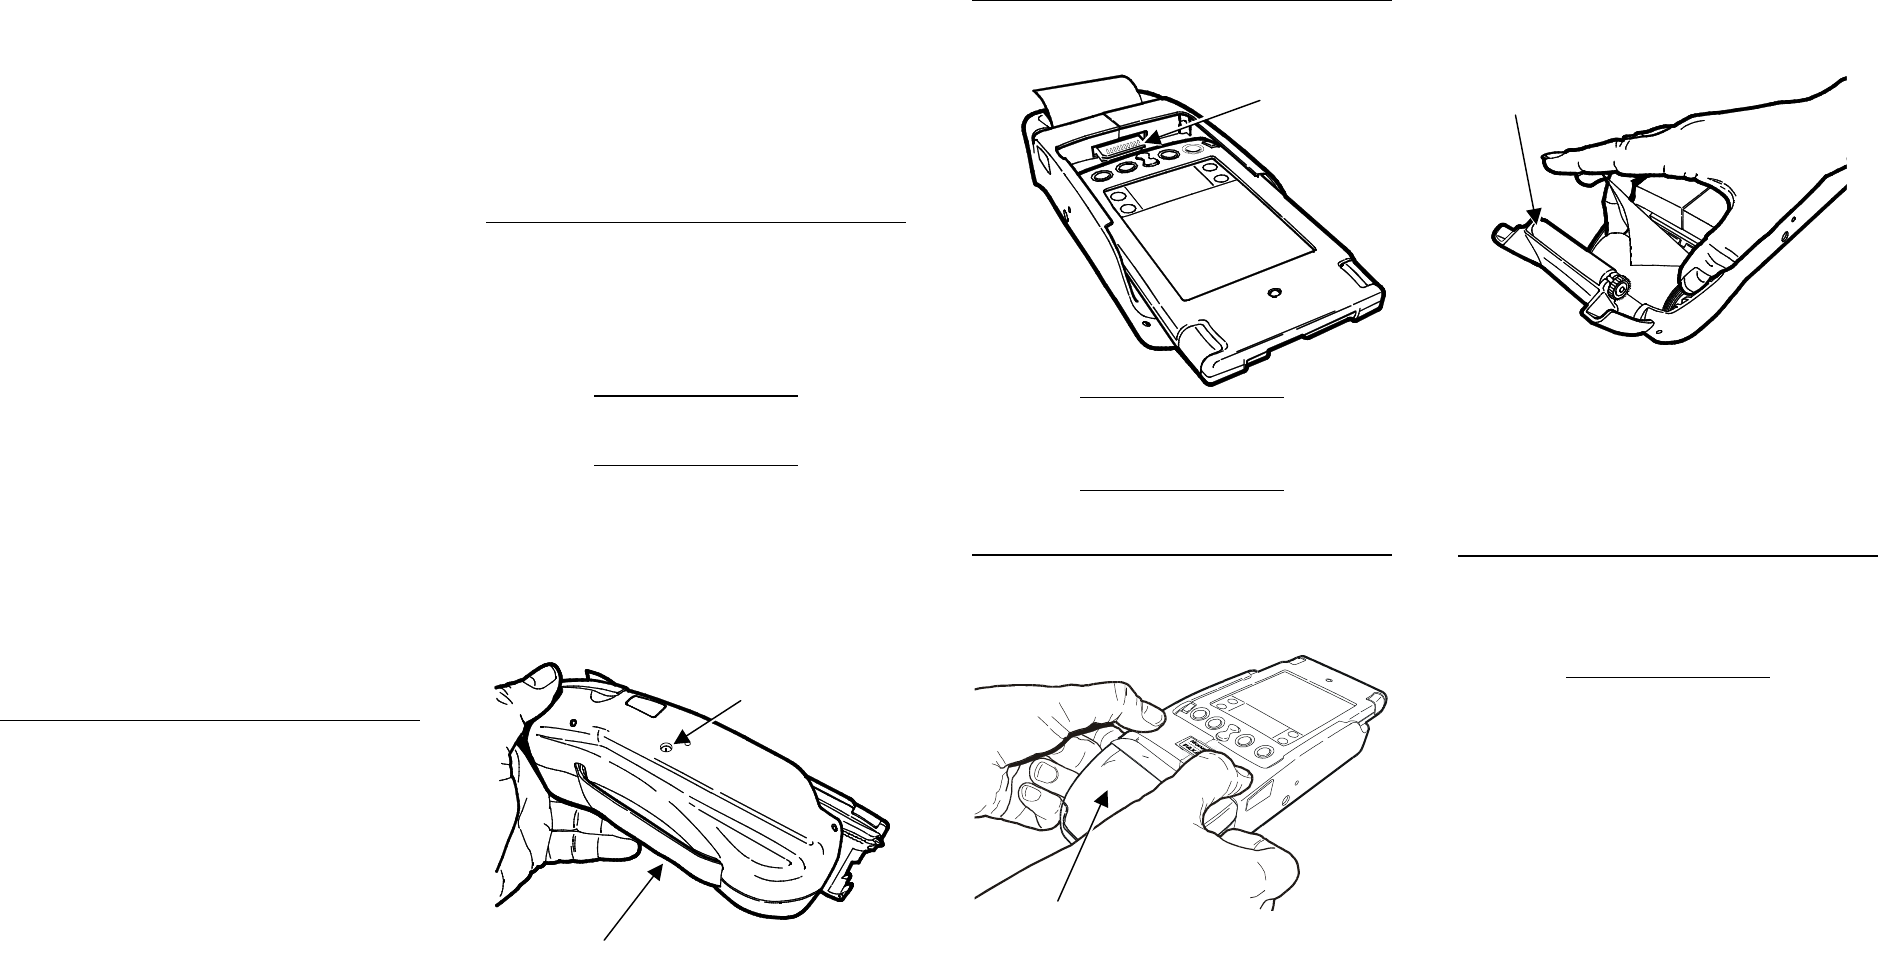
Connecting the Printer
Attach the organizer to the printer's
10-pin connector as shown.
If your organizer has a flip cover,
remove the cover before inserting
the organizer into the printer.
Loading Supplies
1. Open the supply cover by pressing
down with your thumbs and pulling
up with your index fingers.
2. Drop the supply into the well. Make
sure the supply unwinds from the
top as shown.
3. Make sure some supply extends
past the platen roller.
4. Close the supply cover.
Cleaning
CAUTION
Do not use sharp objects to clean
the printhead. This may damage the
printer and require a service charge.
You may need to clean the printhead
and platen roller
♦ after printing approximately six rolls
of supply
♦ whenever you load new supplies
♦ when you see voids in the print.
1. Open the supply cover by pulling
back firmly on the supply cover.
2. Remove the supply roll (when
cleaning the printhead).
Platen Roller
10-Pin Connector
Power connector
goes here
Strap
Supply Cover


