Unpack the 1088IP
Your 1088IP comes with the following equipment. If any piece is missing or damaged, report this to
Raritan Technical Support.
• 1088IP base unit
• Warranty Card
• Accessory CDR Manual /All
• Cable DB9F-DB9F/3000mm Black
• Power code AC China black/6FT
• UTP:1.8M(CAT5-007)
• R1088IP-1U-6U:Bracket
1088IP ─ Front
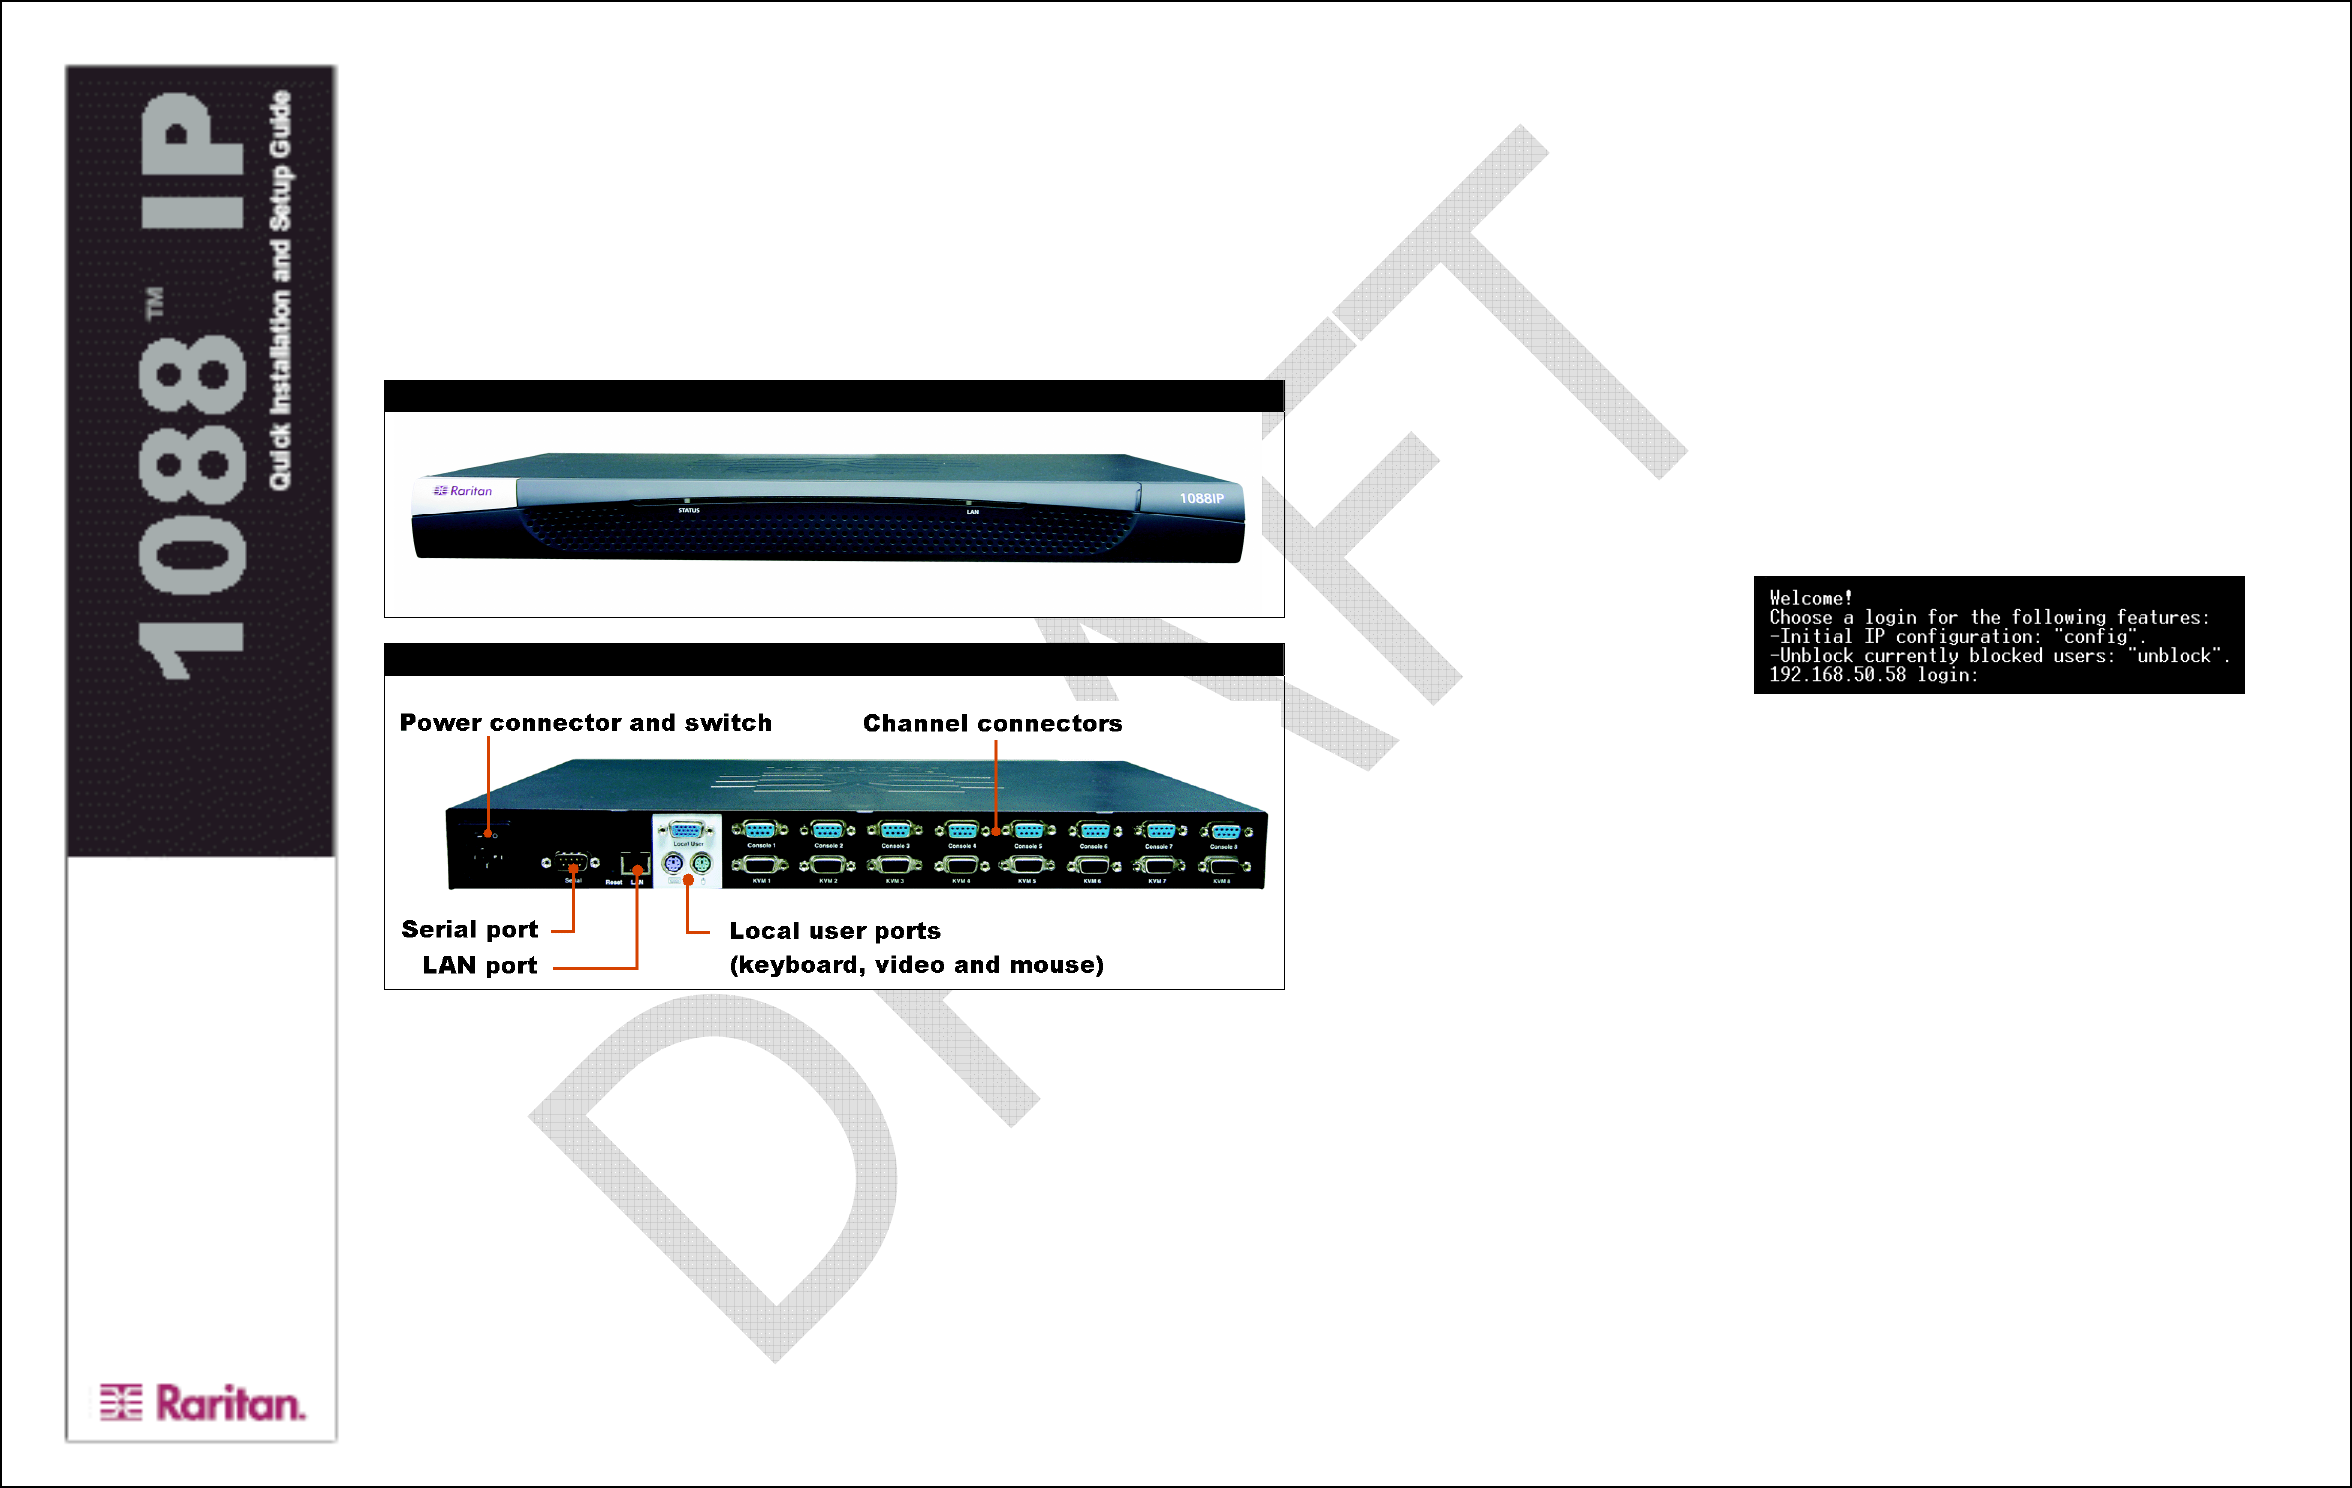
1088IP ─ Back
Install the 1088IP
1. Connect a monitor, keyboard, and mouse to the 1088IP. This is for local access:
a. Connect the monitor cable to the VGA monitor port on the rear of the 1088IP.
b. Connect the keyboard cable to the PS/2 keyboard port on the rear of the 1088IP. This port is
colored green.
c. Connect the mouse cable to the PS/2 mouse port on the rear of the 1088IP. This port is
colored purple.
2. Connect one end of a standard Cat 5e Ethernet cable to the LAN port on the rear of the 1088IP
and connect the other end to your LAN. This is for remote access.
3. Connect one end of the power cable that was shipped with the 1088IP to the power connector on
the rear of the 1088IP and the other end to a power outlet.
4. Flip the power switch to power the 1088IP on.
Connect Target Devices to the 1088IP
Make sure all devices are powered off when you connect them to the 1088 IP. Then, do the following:
1. Connect up to eight serial devices to the eight ports labeled Console 1 ─ Console 8 on the rear of
the 1088IP. Use a standard RS-232 cable to connect the devices.
2. Connect up to eight servers to the ports labeled KVM 1 ─ KVM 8 on the rear of the 1088IP. Use
a CMCIP cable to connect to the monitor, keyboard, and mouse ports on the server. This cable
can be purchased from Raritan.
Configure the 1088IP for Remote Access
To configure 1088IP for remote access over an IP network:
1. Connect a computer to the serial port on the rear of the 1088IP. Use the null modem cable that is
shipped with the 1088IP. Make sure the serial port is configured as shown below:
• Bits/second
= 11520
• Data bites
= 8
• Parity
= No
• Stop bits
= 1
• Flow control
= None
.
2. Launch a terminal emulation program
such as HyperTerminal and open a
console window on the 1088IP. Press
Enter to display the Login prompt
3. At the Login prompt, type config (all lowercase letters) and press Enter.
4. Assign the 1088IP an IP address. There are two ways to do this:
• Dynamically Type dhcp (the default) or bootp and press Enter.
• Statically Type none, and then enter the IP address, subnet mask, and gateway.
5. You are now prompted to enter the following parameters. Make each selection and then press
Enter.
• IP Access Control Switches IP packet filtering on and off. Raritan recommends you keep
the default of No for now. You can later turn it on from the web interface
• LAN Interface Speed Set to Auto by default. You can change the speed to 10 or 100
Mbps
• LAN Interface Duplex Mode Set to Auto by default. You can change the mode to half
or full duplex
6. When you finish, you are prompted to check the parameters you entered. If any are incorrect, type
N, press Enter, and make the appropriate changes. When all parameters are correct, type Y and
press Enter.
7. Congratulations. Configuration is complete. You can close the terminal emulation window and
disconnect your computer from the 1088IP’s serial port.
What to Do Next
1. Go to the monitor, keyboard and mouse that you connected to the 1088IP and configure the
1088IP for local administration. Give the 1088IP a recognizable name, set the display parameters,
and configure the Console and KVM ports. Chapter 3 in the User Guide provides complete
instructions.
2. Open a web browser, point it at the 1088IP’s IP address, and open the web interface. Configure
the 1088IP for remote access. Create user accounts and user groups, set up user permissions, and
secure the 1088IP from unauthorized access. Chapters 4 – 8 provide complete instructions.