1
2
110660-001_F Copyright © 2009 Rimage Corporation Page 1
Shipping
Foam
Tie
Wraps
Side Cover Latches
Latch 1 Latch 2
Latch 3
Plastic Packing Pieces
Shipping Screw
Storage Position
Voltage Switch
Shipping Screw
Instruction Card
Rimage AutoEverest AutoPrinter™
Setup and Installation Guide
Prepare the AutoPrinter
Prepare the Everest
a. Cut the plastic tie wraps (Qty. 2) from
the lift arm.
n Caution! Do not cut the belt or
the cable!
b. Remove the shipping foam inserted
above the carousel.
Before you begin:
This document is intended for people who are familiar with hardware setup, software
installation, and Windows operating systems.
If you do not understand the procedures in this document, ask your computer
technician for help.
This document describes how to set up your Rimage AutoEverest AutoPrinter. If you
are using the Everest printer as a standalone printer or with an autoloader, refer to the
printer or autoloader’s setup and installation instructions.
Documents referenced in this procedure shipped with your product and are also
available online at www.rimage.com/support. Select: Printer Series > AutoPrinter >
User Manuals tab.
- Important!
• Read all setup instructions thoroughly before you begin.
• Save all packing boxes and packing materials for your AutoPrinter and
Everest printer.
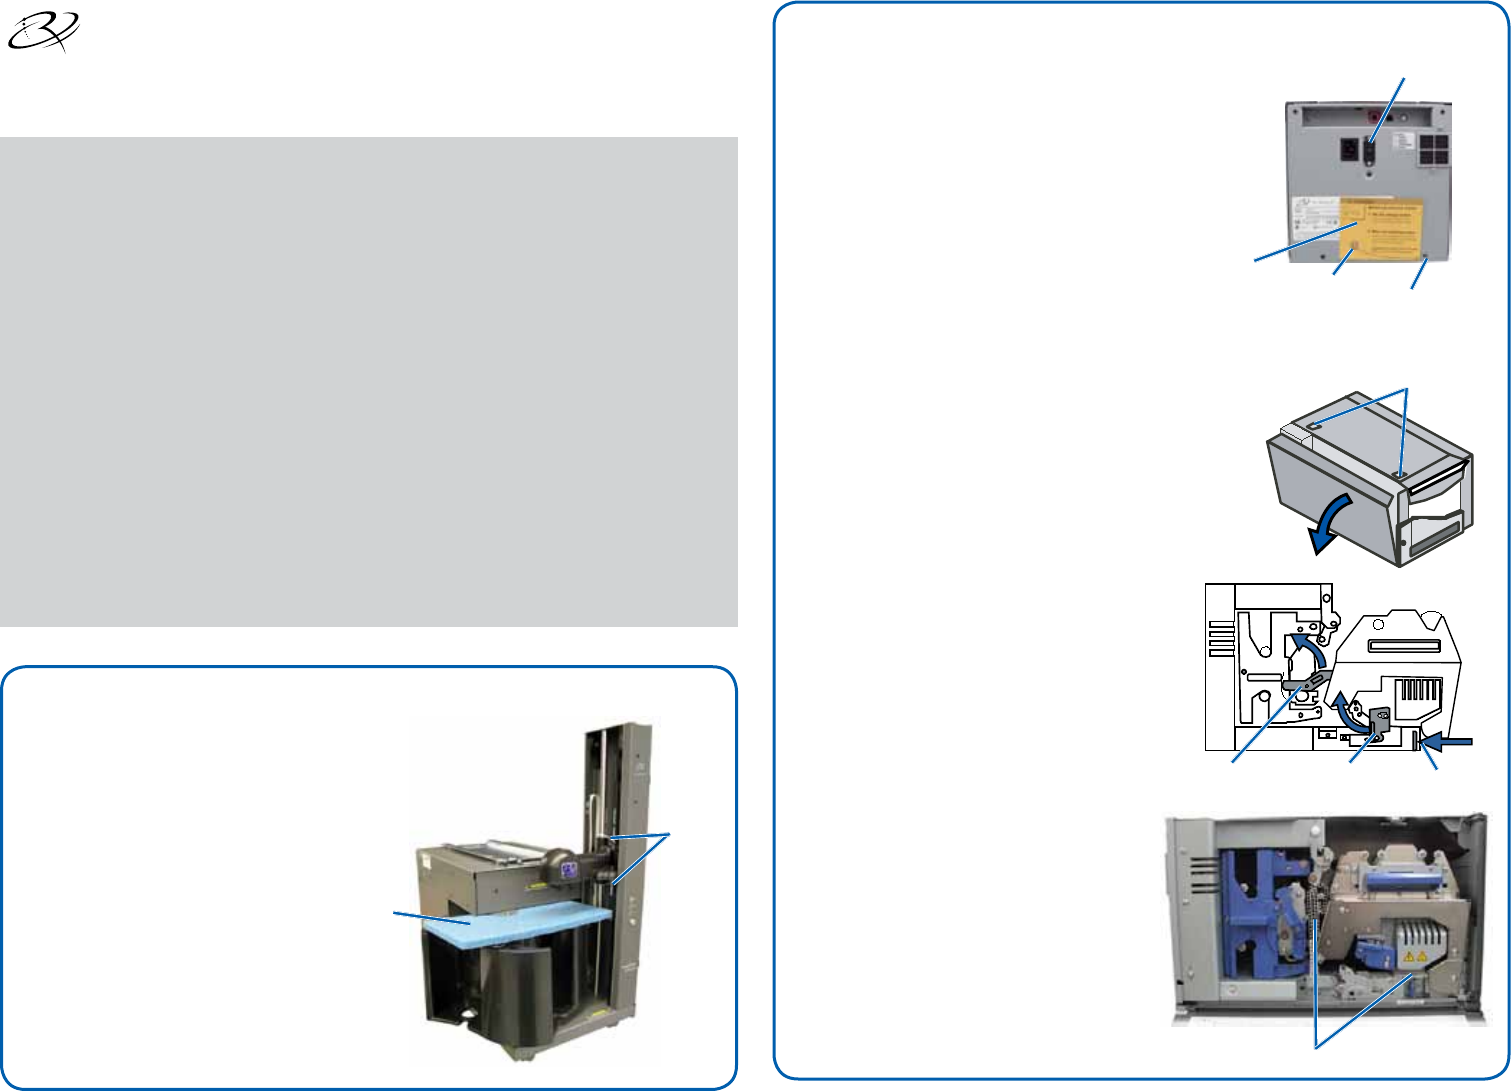
Note: Your product may not look exactly like the product pictured.
# Required tools: Scissors or side cutters
a. Unpack the Everest printer.
Refer to the label on the
Everest printer box.
b. Follow the instructions on the
instruction card on the rear
of the printer.
i. Set the AC voltage
switch.
ii. Move the shipping
screw to the storage
position.
c. Open the Everest printer.
i. Press the two side cover latches.
ii. Lower the side cover.
d. Open latches 1, 2, and 3 as indicated
by the arrows.
e. Remove the plastic packing
pieces (Qty. 2) from inside the
printer.
f. Install the print ribbon and
retransfer ribbon. Refer to
the instruction label on the side
cover, or refer to the Everest
Printer User Guide.


