NovaJet PRO 600e User's Guide
A-2 Calibration
➪➪
➪➪
➪ To adjust the color calibration values
1 Install ink cartridges in the printer. (See Chapter 2 "Getting started" for cartridge
installation instructions.)
2 Load media in the printer that is at least 11 inches (28 cm) wide. (See Chapter 2
"Getting started" for media loading instructions.)
3 Prime the heads to ensure that all cartridges fire correctly. Make sure Color is the
selected print mode.
4 Select Utilities/Color Calibration/Calib Print Test.
The test patterns print.
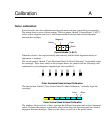
5 Examine the Current Heads pattern; the colored +’s should align with the black lines.
If any of the +’s don’t align, perform the procedure for adjusting the color values.
6 Press Cyan - Vertical.
7 Examine the printout and enter the number that represents the best color alignment
for cyan-vertical.
8 Repeat for each color and for horizontal alignment as well.
Defining Calibration Units
You can set the calibration units to English or Metric.
➪➪
➪➪
➪ To set calibration units
1 Select Setup/User Setup/Units Select.
2 Choose English or Metric.
Paper axis calibration
Choosing Utility/Calibration/Paper Axis Test lets the printer draw a set of vertical marks to
calibrate the paper axis. To measure the marks laid down by the printer, you will need a ruler or
scale at least 33 inches (838.2 mm) long. The vertical marks should be exactly 33.00 inches
(838.2 mm) apart. If the distance between the marks is different from that shown on the display,
you may adjust the printer by setting its values to match the length or width you measured.
➪➪
➪➪
➪ To print the Paper Axis calibration test pattern
1 Load the printer with media that is at least 36 (91 cm) inches long (or the media that
you are going to run; you cannot load a 36" sheet and then run the calibration from a
roll feed because the line lengths will not match).


