


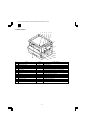


[5] UNPACKING AND
INSTALLATION
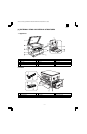
1. Installation of machine
A. Installing conditions
Since the machine performance is largely affected by the installing
place conditions, take enough considerations on the following items
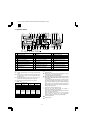
1) Environment
• Avoid installation at a place with direct sunlight. If not, the plastic
parts may be deformed.
• Avoid installation near a heater, a humidifier, or an air conditioner
where humidity and temperature are extremely high or low. If not,
paper may be dampened and dew is formed inside the machine,
causing paper jam or dirty copies.
• Avoid installation at a dusty place. If dust enters the machine, dirty
copy or a trouble may be caused.
• Avoid installation at a place with vibrations. If not, a machine
trouble may be caused.
• Avoid installation at a poorly ventilated place.
• Avoid installation at a place that is filled with ammonium gas. If the
copier is installed near a diazo-copier, dirty copies may be
resulted.
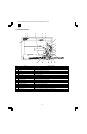
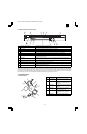
2) Space around the copier
• Allow a space of more than between the copier rear side and the
wall.
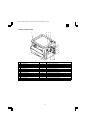
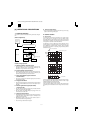
3) Power source
• Use an exclusive-use power outlet of 15A and 100V or more. If the
power plug of this machine is inserted into a power outlet com-
monly used with other illumination units, flickers of the lamp may
be resulted. Use a power outlet which is not used commonly with
any illumination units.
• Avoid complex wiring.
4) Grounding wire connection.
• To avoid danger, be sure to connect a grounding wire. If no groun
ing wire is connected and a leakage occurs, a fire or an electric
shock may be resulted.
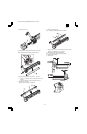
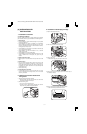
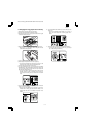
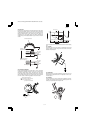
2. Removal of protective material and
fixing screw
1) Remove all tapes and protective material.
• Remove all tapes, then open the document cover and remove
the protective material of sheet shape
2) Remove the fixing screw.
• Use a coin to remove the fixing screw.
• The fixing screw is required when transporting the machine.
Keep it in the tray. (Refer to the later description.)
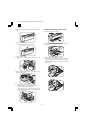
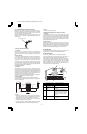
3. Installation of developing cartridge
1) Open the manual paper feed tray.
2) Lift the knob and slide the side cover gently.
3) Open the front cover.
• Hold the both edge gently and open the front cover.
4) Remove the screw from the upper section of the insertion port of
the developer cartridge.
5) Shake a new developer cartridge a few times as shown.
• Shake it horizontally as shown with the arrow.
AR-161
AR-160/161 FM/E [5] UNPACKING AND INSTALLATION 10/20/1998
5 – 1