


SPECIAL MODES
5-12
■
■■
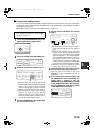
■ Procedure for inserting front and back cover paper
The paper for the front cover is called the front cover paper ("FRONT COVER" in the touch panel). The paper
for the back cover is called the back cover paper ("BACK COVER" in the touch panel).
●Examples of insertion methods for the front and back cover paper are given on pages 5-17 to 5-20.
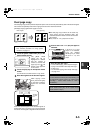
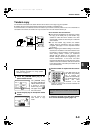
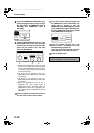
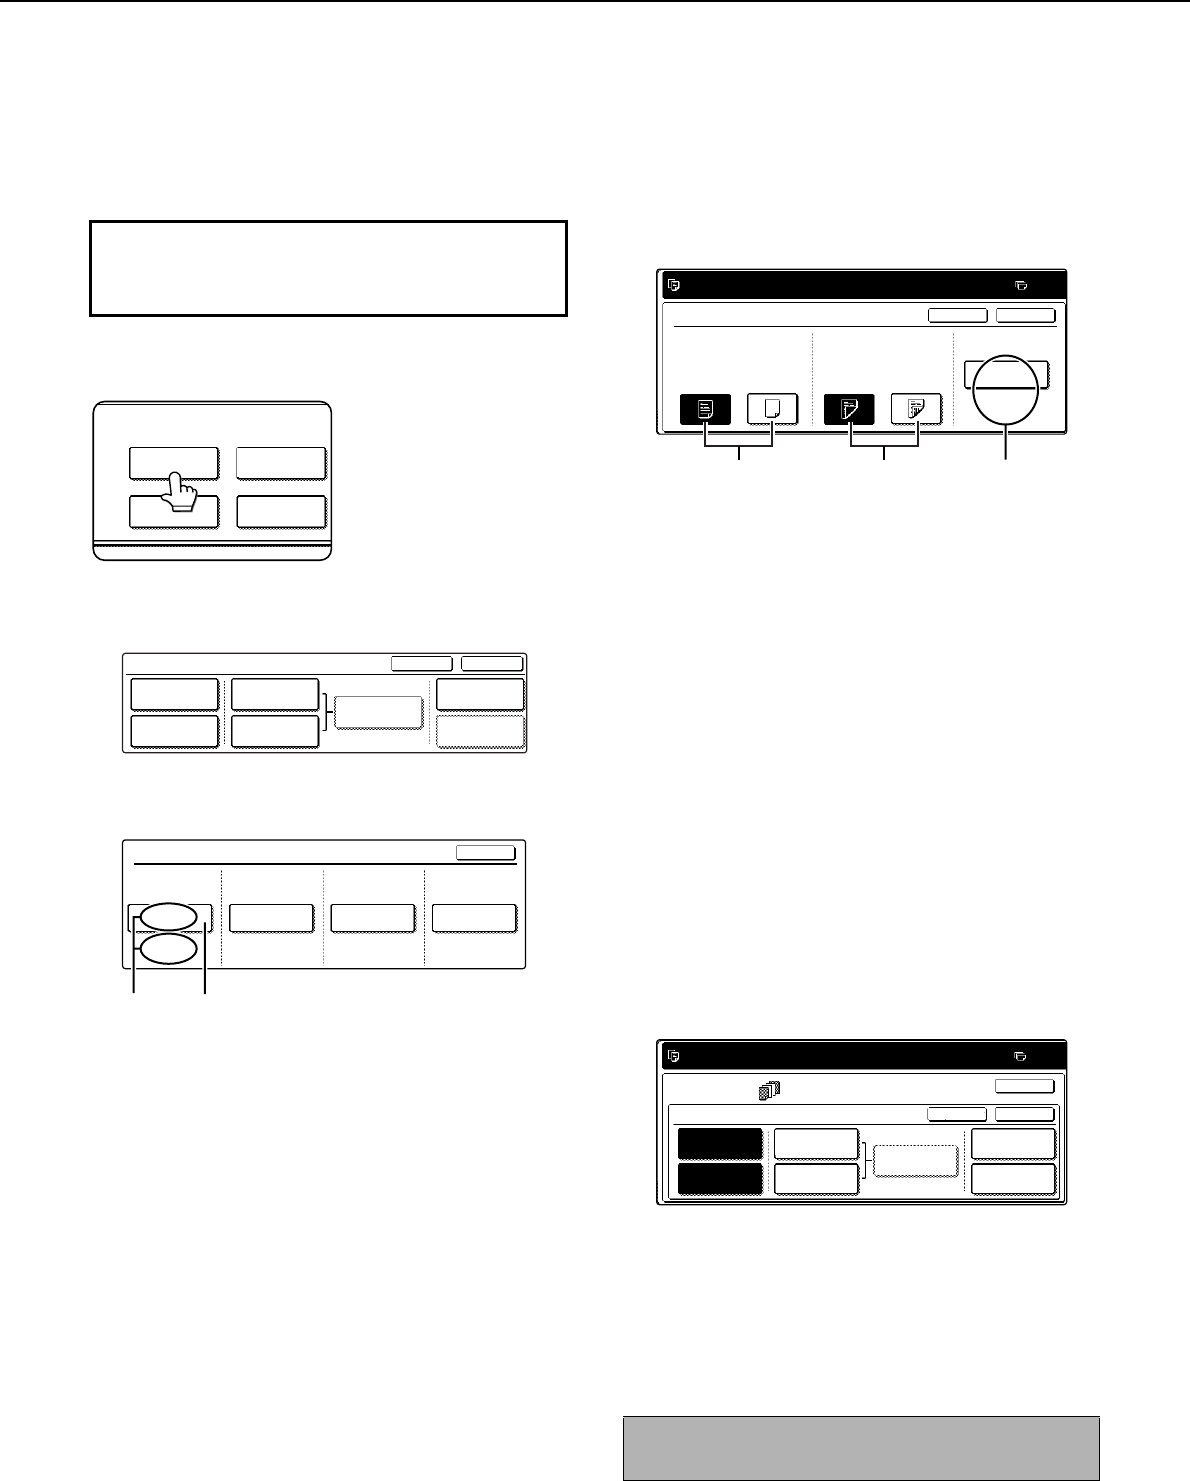
1
Touch the [COVERS/INSERTS] key in the
special modes screen (2nd screen).
2
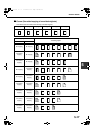
Touch the [PAPER TRAY SETTINGS] key.
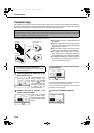
3
Select the tray used for the front cover
paper.
(1)The tray name (tray position) selected for the
front cover paper and the paper size and type
are shown in (X). If the tray in which you
loaded paper for the front cover is shown, touch
the [OK] key. You will return to the screen of
step 2.
(2)If the correct tray for the cover sheet paper
does not appear in (X), touch the (Y) key. The
tray selection screen will appear. Select the
tray in which you loaded paper for the front
cover. You will return to the screen of above.
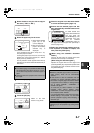
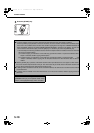
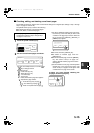
4
Touch the [FRONT COVER] key in the
screen of step 2.
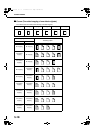
5
Set the insertion conditions for the front
cover paper.
(1)Select whether or not the front cover paper is to be
copied on with the (X) keys ([YES] or [NO]).
(2)Select whether one-sided copying or two-sided
copying is to be performed on the front cover
paper with the (Y) keys. This selection is only
possible when the [YES] key of (X) has been
selected. (The one-sided/two-sided selection
made here only applies to the front cover paper.
When the back cover paper is selected, the
selection only applies to the back cover paper.)
(3)The (Z) key shows the tray selected for the front
cover paper in step 3 and the paper size and
type.
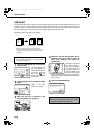
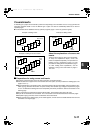
6
Touch the [OK] key in the screen of step 5.
You will return to the screen of step 2.
When you return to the screen of step 2, the
[FRONT COVER] key will be highlighted.
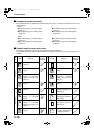
7
To insert back cover paper, repeat steps 2
through 6, using the [BACK COVER] key
instead of the [FRONT COVER] key.
8
Touch the [PAGE LAYOUT] key in the
screen of step 7 to display a list of the
selected settings (page 5-15).
To exit the cover/insert settings, touch the
upper [OK] key in the screen of step 7.
9
Press the [START] key.
To display the special modes screen...
See "General procedure for using special
functions" on page 5-2.
SPECIAL MODES
COVERS/INSERTS
TRANSPARENCY
INSERTS
CARD SHOTBOOK COPY
FRONT COVER
BACK COVER
INSERTION
TYPE A SETTING
PAPER TRAY
SETTINGS
PAGE LAYOUT
CANCEL OK
INSERTION
SETTINGS
COVERS/INSERTS
INSERTION
TYPE B SETTING
A4
PLAIN
PAPER TRAY SETTINGS
FRONT COVER
TRAY2 TRAY2TRAY2 TRAY2 TRAY2
BACK COVER
INSERTION
TYPE A
INSERTION
TYPE B
OK
A4
PLAIN
A4
PLAIN
A4
PLAIN
(X) (Y)
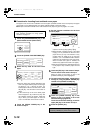
To cancel covers/inserts settings...
Touch the [CANCEL] key in the screen of step 2.
PLEASE SET UP A FRONT COVER.
FRONT COVER SETTING
PRINT ON FRONT COVER
YES NO
1-SIDED 2-SIDED
0
OK
CANCEL
PAPER TRAY
TRAY2
A4
PLAIN
(X)
(Y)
(Z)
PLEASE SET UP COVERS/INSERTS.
SPECIAL MODES
COVERS/INSERTS
FRONT COVER
INSERTION
TYPE A SETTINGS
PAPER TRAY
SETTINGS
PAGE LAYOUT
INSERTION
SETTINGS
INSERTION
TYPE B SETTINGS
BACK COVER
0
OK
OK
CANCEL
Copy_EX.book 12 ページ 2004年9月28日 火曜日 午後9時54分