CUSTOM SETTINGS
2-13
2
5
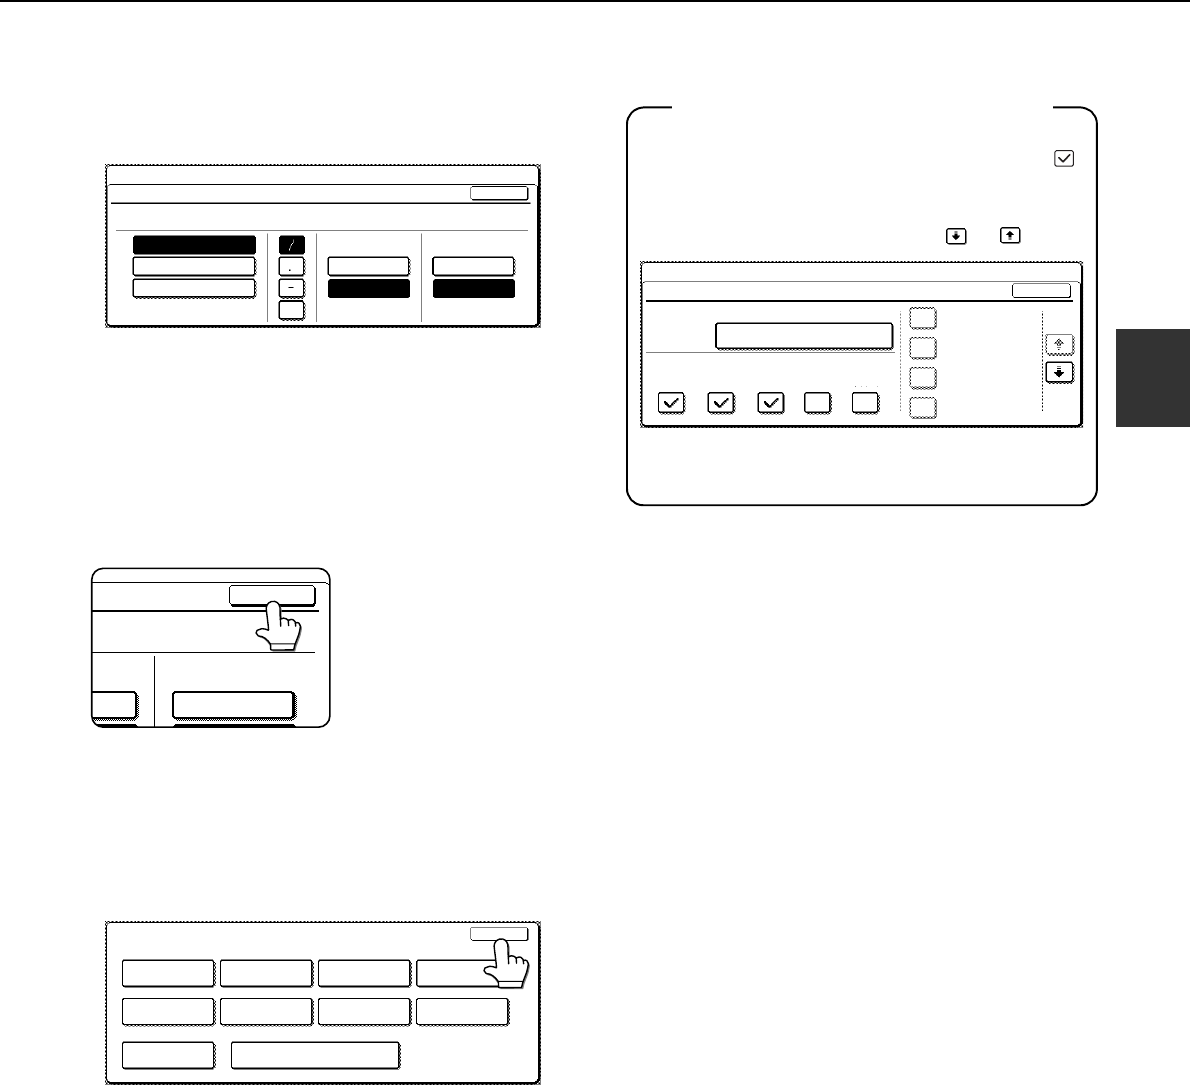
Touch the [DATE FORMAT] key.
The following screen appears.
6
If you wish to change the format of the date
and time, touch the desired format keys.
Touched keys are highlighted.
The selected format is applied to lists printed out in
"LIST PRINT".
7
Touch the [OK] key.
You will return to the
date and time setting
screen.
8
Touch the [OK] key.
9
To exit the settings, touch the [EXIT] key.
CUSTOM SETTINGS
DATE FORMAT
YYYY/MM/DD
MM/DD/YYYY
DAY-NAME
POSITION
OK
FIRST 12-HOUR
24-HOUR
LAST
2004/10/20/MON 14:27
DD/MM/YYYY
ME
ON
OK
T 12-HOUR
CUSTOM SETTINGS
LIST PRINT
FAX DATA
RECEIVE/FORWARD
PAPER TRAY
SETTINGS
EXIT
DEFAULT
SETTINGS
SENDER CONTROL
KEY OPERATOR PROGRAMS
ADDRESS CONTROL
TOTAL COUNT
DOCUMENT FILING
CONTROL
PRINTER
CONDITION
More information on setting procedures
In the following type of screen, a setting is selected
by touching the key so that a checkmark ( )
appears. The settings below are configured to
allow use of tray 1 in print, copy, and fax modes. To
display the next screen, touch the or keys.
FAXCOPYPRINT
TRAY1
TYPE / SIZE
CUSTOM SETTINGS
PAPER TRAY SETTINGS
PLAIN / A4
FIXED PAPER SIDE
1/4
OK
DOC.
FILING
I-FAX
DISABLE DUPLEX
DISABLE STAPLE
DISABLE PUNCH
Copy_EX.book 13 ページ 2004年9月28日 火曜日 午後9時54分


