


5-21
5
SADDLE STITCH FINISHER
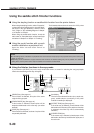
1
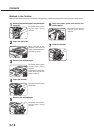
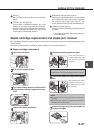
Open the front cover.
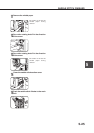
2
Pull out the stapler section.
3
Turn roller rotating knob A in the direction
of the arrow to move the staple unit to your
side.
4
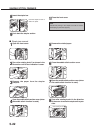
Remove the empty staple box.
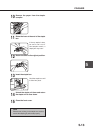
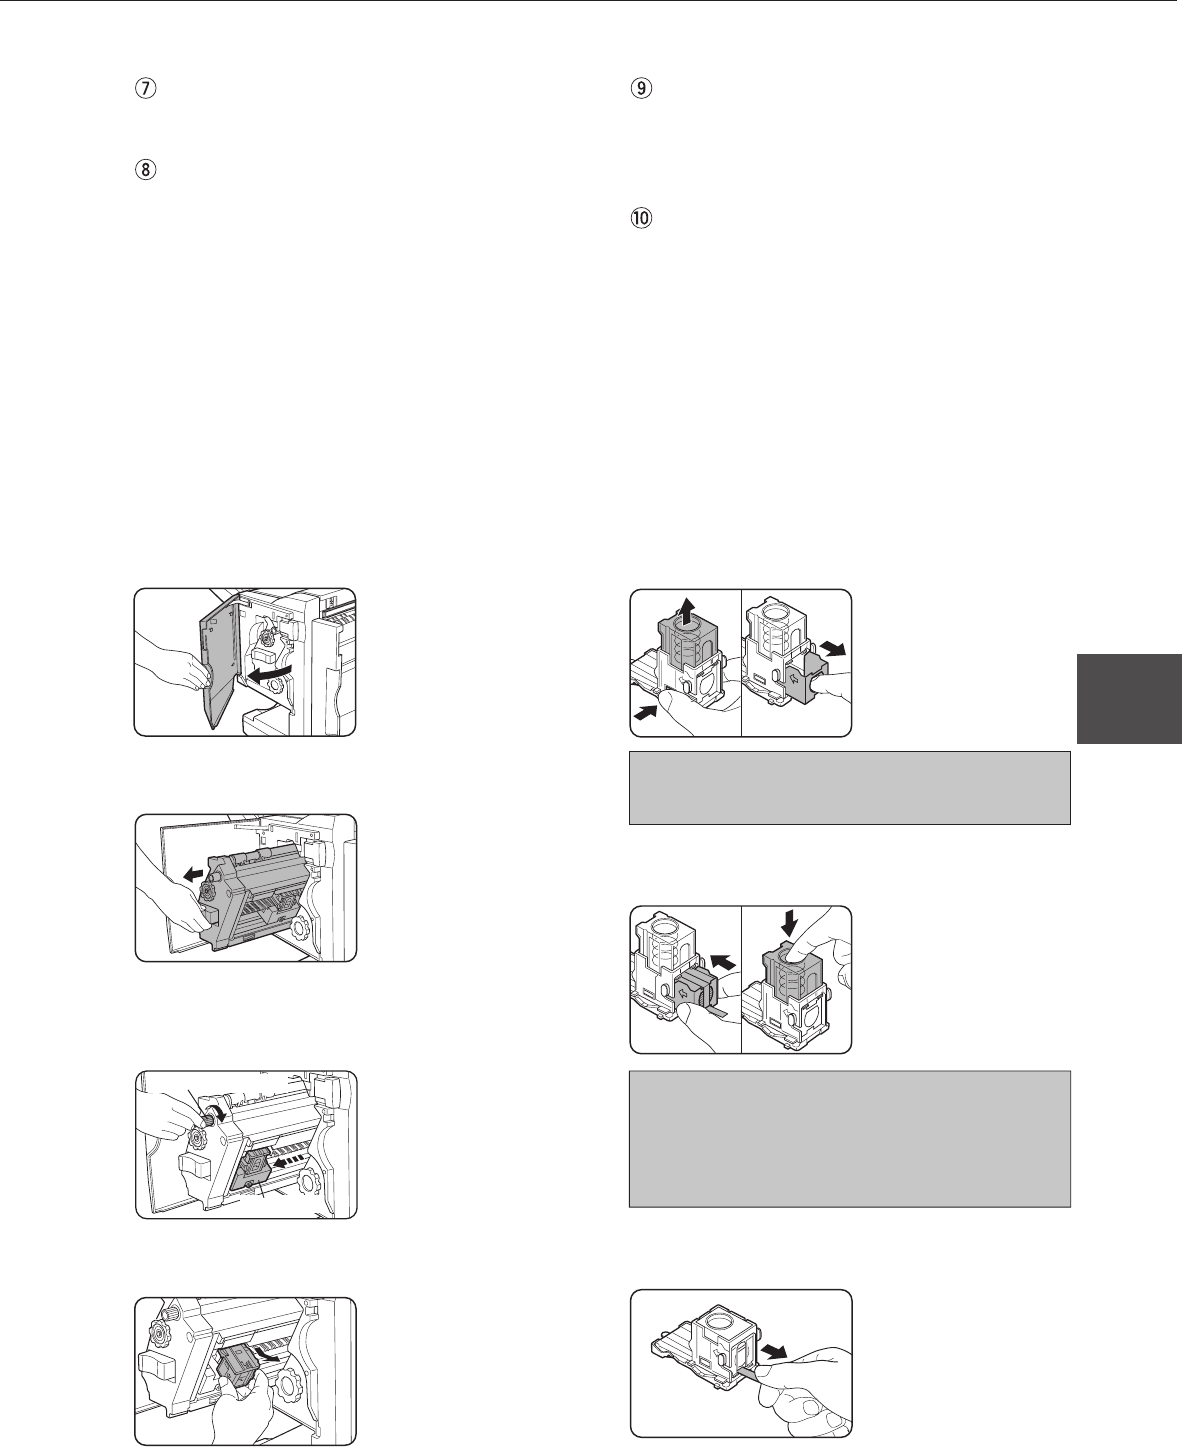
5
Remove the empty staple cartridge.
Press the lock button to
unlock the staple box cover
and remove the staple
cartridge.
NOTE
If staples remain, the staple cartridge cannot be removed.
6
Insert a new staple cartridge into the staple
box.
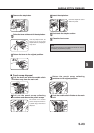
After inserting the staple
cartridge, press down on
the staple box cover to lock
the cartridge.
NOTES
● Do not remove the fixing tape before inserting the
cartridge.
● Ensure that the staples are securely fixed. Push the
cartridge until it clicks in place.
7
Remove the tape that fixes the staples by
pulling it straight.
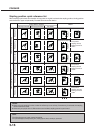
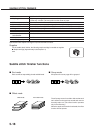
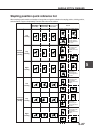
[OK] key
Press to close this screen and to return to the basic
screen.
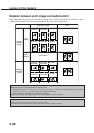
[OFFSET] key (See page xx.)
If this function is selected (checked), the offset
function will be enabled. If the check mark is cleared,
the offset function will be disabled. (If the staple sort
function is selected, the check mark of the offset
function will be automatically cleared.)
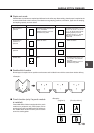
`[SADDLE STITCH] key (See page xx.)
Printed paper will be stapled at the center and folded
in two with the center down. If this function is selected,
the pamphlet copy function (see page xx of the
copier operation manual) will be automatically set.
[PUNCH] key (See page xx.)
If a punch module is installed, printed paper can be
punched.
* If a function is selected, the corresponding key
will be highlighted.
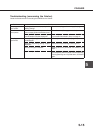
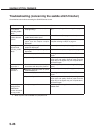
Staple cartridge replacement and staple jam removal
When the staple cartridge is empty or staples become jammed, a message will appear in the message display of the
operation panel.
Follow the procedure below to replace the staple cartridge or remove jammed staples.
■ Staple cartridge replacement
Roller rotating knob A
Staple unit