


User’s Guide 8-21
Hard Disk Drive
Accessories
Hard Disk Drive
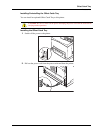
1. Ensure that the printer power switch is set to the OFF <O> position.
2. Disconnect the power cord from the wall outlet.
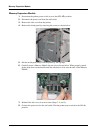
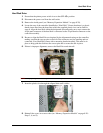
3. Remove the inside panel (see “Memory Expansion Module” on page 8-20).
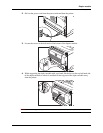
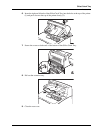
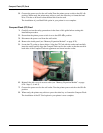
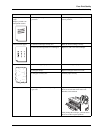
4. Locate the area of the controller identified as “Hard Disk”. Ensure that there is a plastic
female insert fitted into the board into which the supplied plastic rivet can be fitted in
stage 8. Align the hard disk within the designated area and gently move up to ensure the
44-pin male connector of the hard disk is connected to the 44-pin female connector on the
controller assembly.
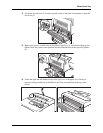
5. Be sure to align the Hard Drive as depicted by the alignment drawing on the controller,
making sure that the two top pins to the left of the connector are free standing and not
connected. Your Hard Disk comes with a mounting bracket installed. This must be in
place to help guide the disk into the correct pins and to secure the disk in place.
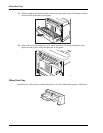
6. If there is improper alignment, remove the Hard Drive and reinstall.
NOTE: Improper alignment will damage the hard drive and the printer.
7. Insert the plastic rivet through the aligned hole until it clicks.
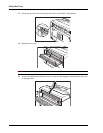
8. Reinstall the covers in reverse order (see “Memory Expansion Module” on page 8-20–
Steps 3, 4, and 5).