


4-16 User’s Guide
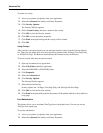
Paper Tab
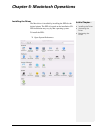
Windows Operations
“Load Paper”
or
“Load Paper TrayX” “X” is the tray number where the paper should be loaded.
If “Load Paper” is the displayed message, the paper may be loaded into any tray. If the paper
size being loaded cannot be auto-sensed, then the Operator Panel must be used to configure the
paper size. After the paper is loaded, the printer will automatically resume printing. If you
want to simply continue printing on the default input tray without checking the paper size
requested, press the START/STOP key to resume printing.
If “Load Paper TrayX” message is displayed, then loading the requested paper into the
indicated tray will cause the printer to automatically resume printing. If the paper is loaded into
a tray other than the one indicated, then pressing the START/STOP key will allow the printer to
resume printing if “Auto Tray Change” is enabled.
When both Auto Resize and Media Check are ON, the paper size requested, via the driver, will
not be enforced because Auto Resize overrides the paper size aspect of Media Check. If you
want to enforce a specific paper size, then it is necessary to disable Auto Resize via the
Operator Panel’s Paper Menu.
To enable media check:
1. Select the Paper tab within your Printer Properties.
2. Check Media Check.
3. Click OK.
When Media Check is disabled:
The printer will print from the default paper tray. The size or type of paper in the tray is not a
factor in paper tray selection.
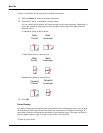
Skip Blank Pages
If pages exist in your document that do not contain text, you may select not to print them.
To skip blank pages:
1. Select the Paper tab within your Printer Properties.
2. Check Skip Blank Pages.
3. Click OK.