


12
STAMPING SCANNED ORIGINALS (VERIFICATION STAMP FUNCTION)
If the optional verification stamp unit has been installed on the scanner unit, you can
have a pink fluorescent " " mark stamped on the edge of each original that is scanned
using the auto document feeder.
This feature does not operate for originals scanned on the document glass.
NOTE
When both sides of an original are scanned, only the front side of the original is stamped.
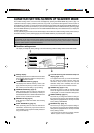
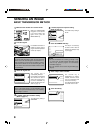
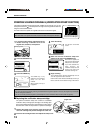
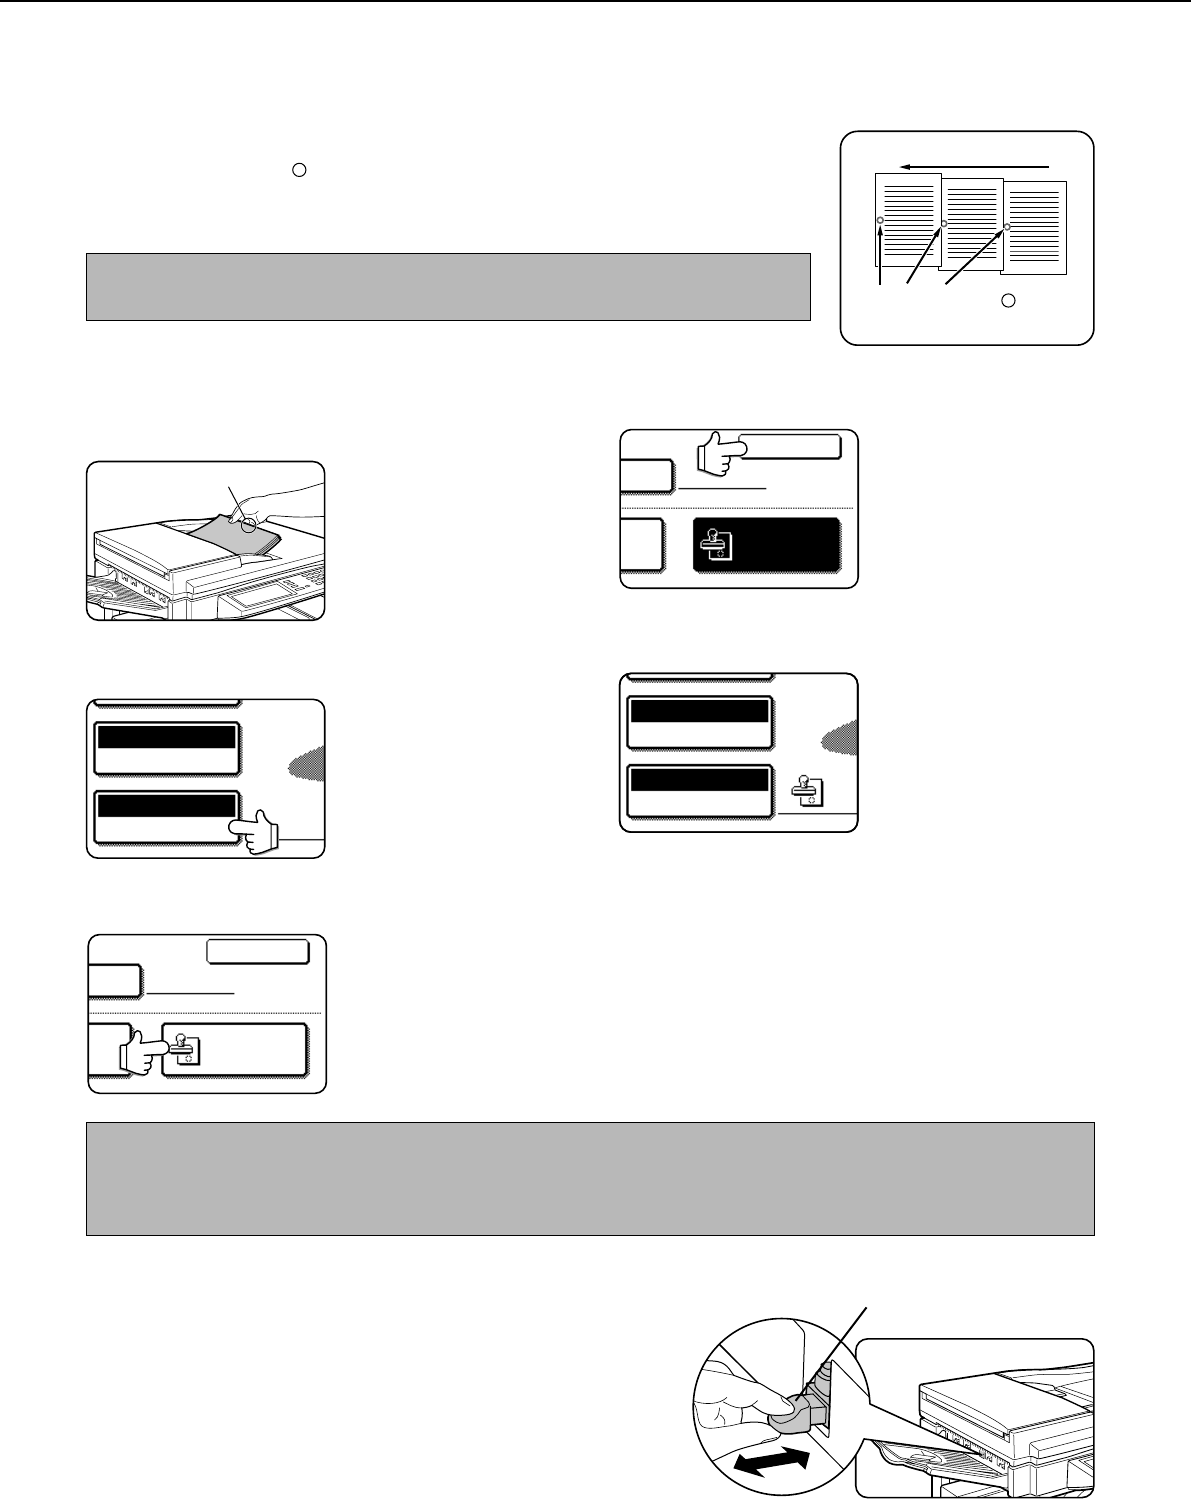
A pink fluorescent " " mark is
stamped on scanned originals.
Paper feed direction
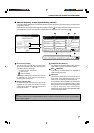
1
In scanner mode, load the original and set any
needed scanning conditions such as the
original size, resolution, and exposure.
Stamping position
2
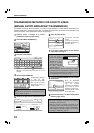
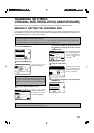
Touch the ORIGINAL key.
AUTO 8 X11
1
/
2
ORIGINAL
STANDARD
RESOLUTION
3
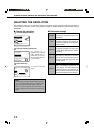
Touch the STAMP key.
OK
STAMP
L
ED
T
The STAMP key is only
displayed if the verification
stamp unit has been
installed.
When touched, the key is
highlighted.
4
Touch the OK key.
OK
STAMP
L
ED
T
You will return to the initial
screen.
5
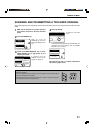
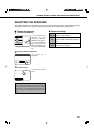
Make sure that the verification stamp icon
appears to the right of the ORIGINAL key.
AUTO 8 X11
1
/
2
ORIGINAL
STANDARD
RESOLUTION
When this icon appears, the
edge of each original will be
stamped as it is scanned.
If you have selected two-
sided scanning, the
verification stamp icon will
appear to the right of the
two-sided scanning icon.
6
Begin scanning.
The verification stamp function automatically turns off
when all originals have been scanned.
Note that the function will also automatically turn off if you
take no action for one minute after turning on the function.
NOTES
• If an error occurs during scanning, scanning is canceled and the original is ejected. In this case, the original may be stamped
without having been scanned.
• You can use the key operator program to permanently turn on the verification stamp function. (Refer to page 26.)
■■
■■
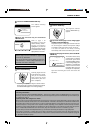
■ Replacing the verification stamp cartridge
The optional verification stamp unit contains a consumable
verification stamp cartridge (ink cartridge). This cartridge (AR-
SV1) must be replaced when the mark stamped on each original
becomes faint. Follow the steps below to replace the cartridge.
1
Remove the stamp cover, and then grasp the finger hold
on the ink cartridge and pull the cartridge out of the unit.
2
Insert the new cartridge into the unit. Replace the stamp cover.
Finger hold
SENDING AN IMAGE