


-58
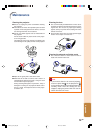
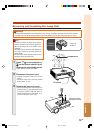
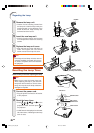
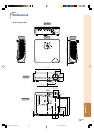
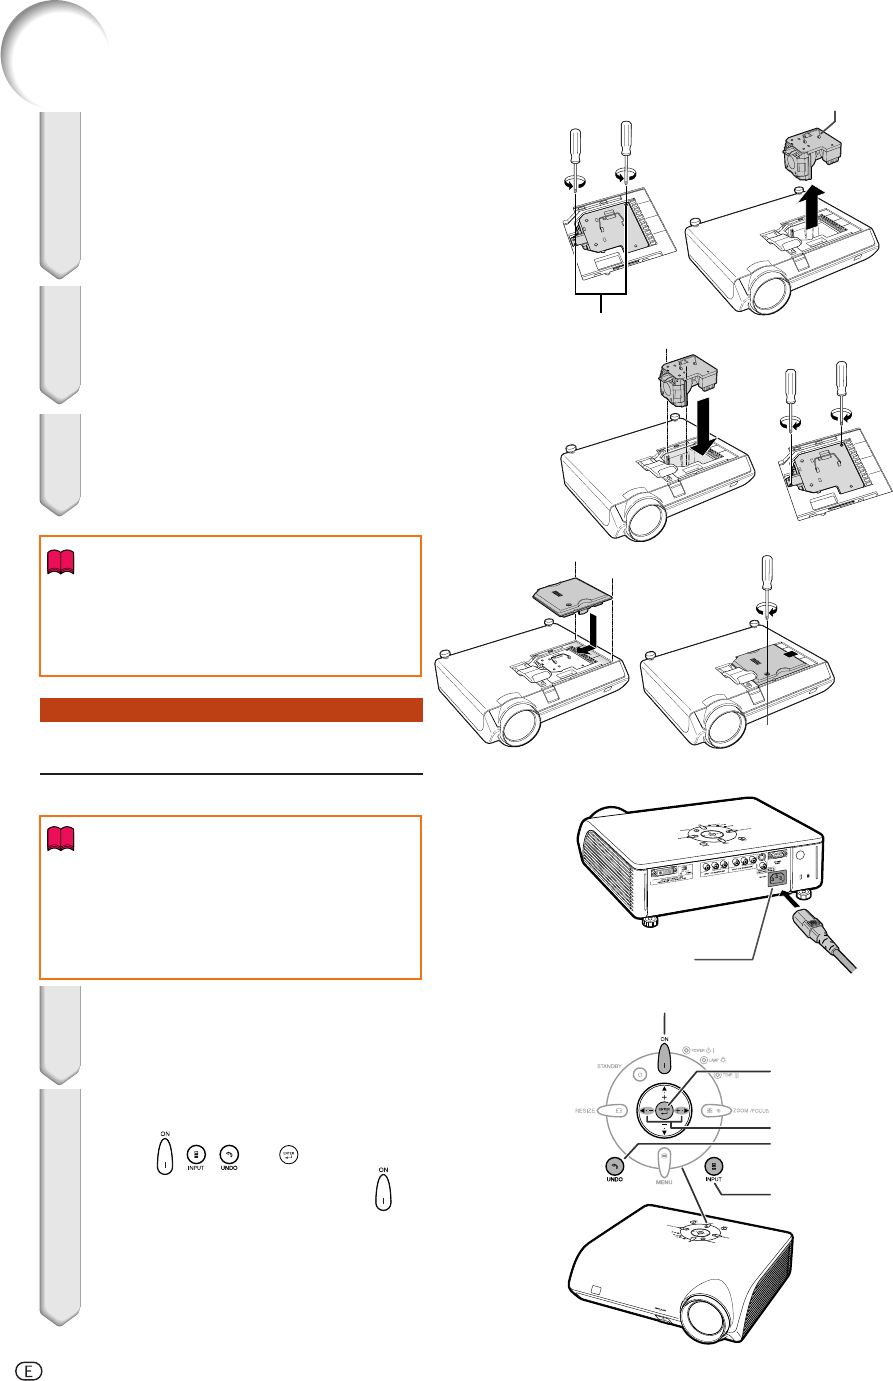
4 Remove the lamp unit.
•Loosen the two securing screws from
the lamp unit. Hold the lamp unit by the
handle and pull it in the direction of the
arrow. At this time, keep the lamp unit
horizontal and do not tilt it.
5 Insert the new lamp unit.
•Press the lamp unit firmly into the lamp
unit compartment. Fasten the securing
screws.
6 Replace the lamp unit cover.
•Align the lamp unit cover and slide it to
close. Then tighten the user service
screw to secure the lamp unit cover.
Info
•If the lamp unit and lamp unit cover are not
correctly installed, the power will not turn
on, even if the power cord is connected to
the projector.
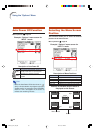
Resetting the Lamp Timer
Reset the lamp timer after replacing the lamp.
Info
•Make sure to reset the lamp timer only
when replacing the lamp. If you reset the
lamp timer and continue to use the same
lamp, this may cause the lamp to become
damaged or explode.
1 Connect the power cord.
•Plug the power cord into the AC socket
of the projector.
2 Reset the lamp timer.
•Press , , ,
\\
\\
\, and
||
||
| on the
projector in order, and then press on
the projector.
•“LAMP 0000H” is displayed on the lower
left of the screen, indicating that the lamp
timer is reset.
Regarding the Lamp
Securing screws
Handle
User service screw
(for lamp unit cover)
AC socket
\
/
|
buttons
ON button
ENTER button
UNDO button
INPUT button
DT400_E_P53_60.p65 04.10.18, 1:26 PM58