


Table of
contents
Operation
Search
MENU/Settings
Search
Index
80
GB
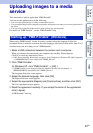
Using the software
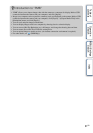
1 Turn on your computer, and insert the CD-ROM (supplied) into the CD-
ROM drive.
The installation menu screen appears.
• If it does not appear, double-click [Computer] (in Windows XP, [My Computer]) t
(SONYPMB).
• If the AutoPlay screen appears, select “Run Install.exe” and follow the instructions that appear on the
screen to proceed with the installation.
2 Click [Install].
The “Choose Setup Language” screen appears.
3 Select the desired language, then proceed to the following screen.
The “License Agreement” screen appears.
4 Carefully read the agreement, click the radio button ( t ) to accept
the terms of the agreement, and then click [Next].
5 Follow the instructions on the screen to complete the installation.
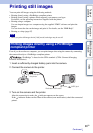
• For the installation, connect the camera to the computer during the procedure (page 82).
• When the restarting confirmation message appears, restart the computer following the instructions on
the screen.
• DirectX may be installed depending on the system environment of your computer.
6 Remove the CD-ROM after the installation is complete.
7 Start up the software.
• To start up “PMB”, click (PMB) on the desktop.
For the detailed operation method, see the PMB Support page (http://www.sony.co.jp/pmb-se/)
(English only) or click (PMB Help).
• To start up “PMB” from the Start menu, select [Start] t [All Programs] t (PMB).
• Log on as Administrator.
• When “PMB” is started up for the first time, the confirmation message of the Information tool appears on
the screen. Select [Start].
Installing “PMB (Picture Motion Browser)”
(Windows)
Notes
Continued r