


44
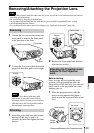
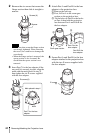
Removing/Attaching the Projection Lens
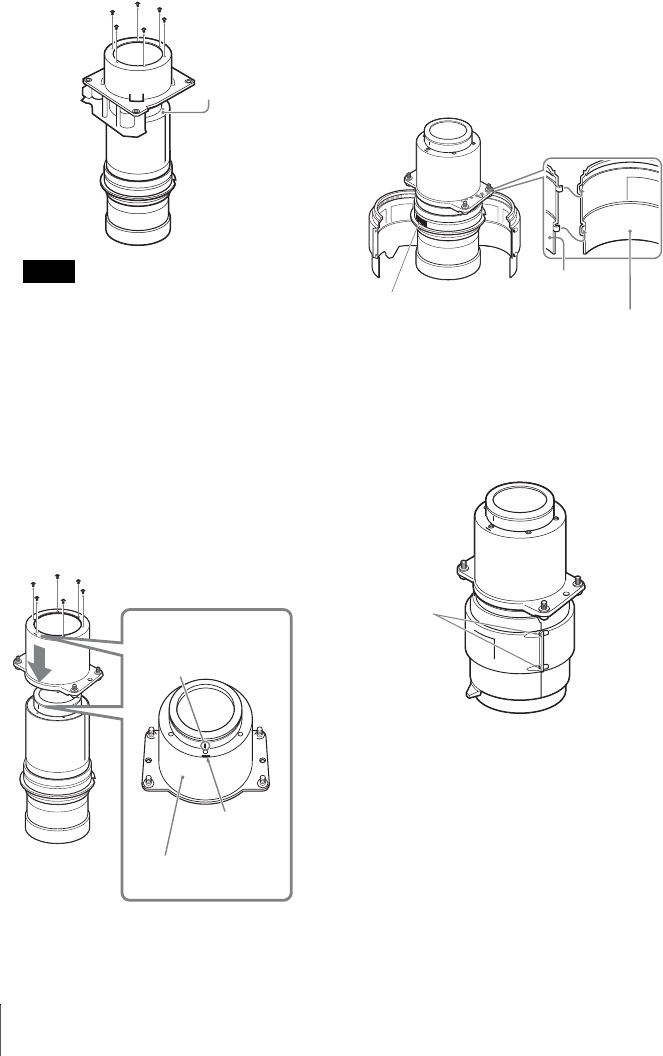
2 Remove the six screws that secure the
flange section then slide it straight to
remove.
• The screws that secure the flange section
are strongly tightened. When removing
the screws, be careful not to damage the
screw heads.
• When the flange section is removed, the
spacer section is also loosened. Be
careful that the spacer section is not
removed.
3 Insert Part C for the lens adapter all the
way until it is securely in place, align the
mark with the mark placed in step 1,
then tighten the six D screws supplied
with the lens adapter.
4 Attach Part A and Part B for the lens
adapter to the projection lens.
1 Remove the lens cap.
2 First, fit Part A to the zoom gear
section on the projection lens.
3 Fit the holes on Part B to the hooks
on Part A then hold the projection
lens between Part A and Part B for
the lens adapter.
5 Secure Part A and Part B for the lens
adapter attached to the projection lens
with the two E screws supplied with
the lens adapter.
Notes
Screws (6)
Spacer
Mark placed in step 1
Mark
Part C for the lens
adapter
D screws (6)
Zoom gear section
Part A for the
lens adapter
Part B for the
lens adapter
2
3
E screws
(2)