


40
GB
Making various prints (Creative Print)
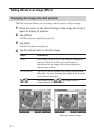
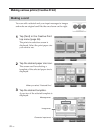
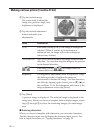
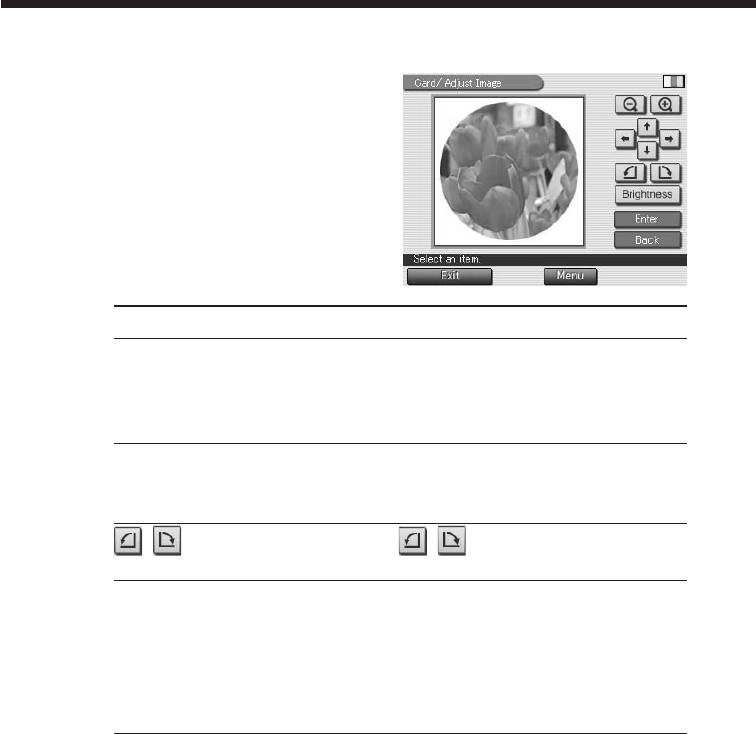
2 Tap the desired image.
The screen used to adjust the
image size, position, angle, and
brightness is displayed.
3 Tap the desired adjustment
button and make your
adjustments.
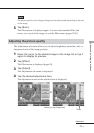
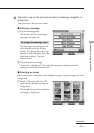
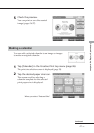
Items Procedures
#/3 Each time you tap 3 or #, the image is enlarged or
reduced. (When it reaches to its maximum or
minimum size, an image will not be enlarged or
reduced any further.)
$/4/%/5 Tap $/4/%/5 to move the image in the desired
direction. You can also drag the image in the preview
to the desired direction.
/ Each time you tap / , the image rotates 90°
counterclockwise or clockwise.
Brightness The brightness adjustment slider is displayed. Drag
the slider upwards to brighten the image or
downwards to darken the image. You can also move
the slider by tapping upper/lower part or [V]/[v] on
the scroll bar. To fix the adjustment and return to the
image adjustment screen, tap [Enter].
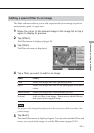
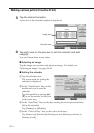
4 Tap [Enter].
A preview image is displayed. The selected image is displayed in the
image area. When you choose a template with multiple images, repeat
steps 1 through 4 to select the remaining image(s) for each image
area.
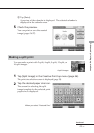
x Entering characters
When you choose a template with characters, you can enter characters.
Tap the character input area to display the character input screen. For
how to input characters, see “Typing characters” on page 50.