


88
Installation and Adjustment
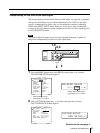
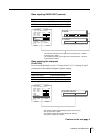
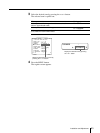
COLOR ADJUST COLOR : 200
/ COL / LAY / PRN / IN / OUT /
LOAD COLOR : 1 / 2 / 3 TEMP
: 1 / 2 / 3 [EXEC]
MAG – GRN : 0
YEL – BLU : 0
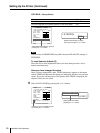
DARK
LIGHT
SHARPNESS
INTERPOL.
SAVE COLOR
CYN – RED : 0
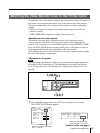
Q1 A 1
S
: 0
: 0
: 8
: OFF / ON
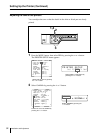
M
AG–GRN : 0
C
YN–RED : 0
Y
EL BLU : 0
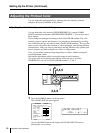
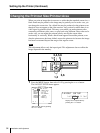
4 Adjust the printout color.
1 Select the item to be adjusted by pressing the F or f button.
2 Perform the adjustment by pressing the G or g button.
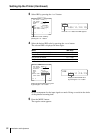
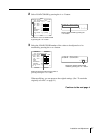
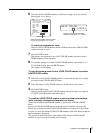
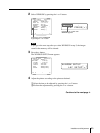
The RED, GREEN and BLUE color component and contrast settings are
divided into 15 steps, from –7 to +7, indicated by a value and graph. The
center of the graph (0) corresponds to the standard color.
SHARPNESS is divided into 15 steps from 1 to 15, indicated by a value and
graph. A setting of step 8 corresponds to the standard sharpness.
For INTERPOL. (interpolation), select either ON or OFF depending on the
type of image
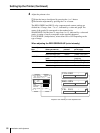
When adjusting the RED/GREEN/BLUE (color intensity)
Menu Adjustment
item
CYN-RED
MAG-GRN
YEL-BLU
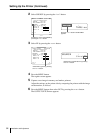
When you want to
Make the image reddish.
Make the image cyan.
Make the image magenta
(pink).
Make the image greenish.
Make the image yellowish.
Make the image bluish.
Adjustment direction
on the menu
Toward RED
Toward CYN (cyan)
Toward MAG
(magenta)
Toward GRN (green)
Toward YEL (yellow)
Toward BLU (blue)
Button to be
pressed
g button
G button
g button
G button
g button
G button
Adjust the color intensity for each adjustment item.
Setting Up the Printer (Continued)