


VAIO Digital Studio System Reference Manual
16
Accessing the BIOS Setup Utility
You must access the BIOS Setup Utility to make changes to the BIOS
settings (see “CMOS Setup Options” on page 53 for information on BIOS
settings).
1 Reboot your computer by selecting Shut Down... from the Start
menu, then selecting Restart.
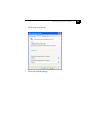
2 When the Sony logo appears, press F3. The following message
appears at the bottom of the screen.
Press <F2> for setup.
3 Press F2.
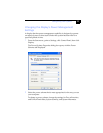
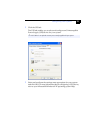
Each menu presents options for modifying the system configuration.
Use the left and right arrow keys to select a menu from the menu bar.
Use the up and down arrow keys to select items within a menu. Once
an item is highlighted, use the plus/minus (+/-) keys to modify a
setting.
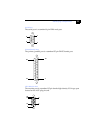
If an item has a triangle ( ) to its left, this indicates that a sub-menu
of options is available. Press ENTER to access a sub-menu. If a sub-
menu contains items with a triangle, there is another layer of options
from which to select.
4 Once you select an option, press ESC to back out of each menu until
you reach the top level, where the menu bar appears.
5 To exit the BIOS setup utility, press ESC from any top-level screen and
follow the prompts.
! Before rebooting the system, save and close all open files, and exit open
applications.