Instruction Manual
DE: Bedienungsanleitung - de.startech.com
FR: Guide de l'utilisateur - fr.startech.com
ES: Guía del usuario - es.startech.com
IT: Guida per l'uso - it.startech.com
NL: Gebruiksaanwijzing - nl.startech.com
PT: Guia do usuário - pt.startech.com
Manual Revision: 04/08/2011
For the most up-to-date information, please visit: www.startech.com
Packaging Contents
• 1 x Trayless Mobile Rack
• 1 x SATA Data Cable
• 1 x Set of Keys
• 1 x Package of Mounting Screws
• 1 x Installation Guide
System Requirements
• Computer chassis/case with available 5.25in external bay
• SATA enabled computer system with available SATA data/power
connections
HSB110SATBK
5.25in Trayless Hot Swap Mobile Rack for 3.5in SATA Hard Drives w/LCD and Fan
Installation
WARNING! Hard drives and storage enclosures require careful
handling, especially when being transported. If you are not careful
with your hard disk, lost data may result. Always handle your hard
drive and storage device with caution. Be sure that you are properly
grounded by wearing an anti-static strap when handling computer
components or discharge yourself of any static electricity build-up
by touching a large grounded metal surface (such as the computer
case) for several seconds.
1. Turn your computer o and any peripherals connected to the
computer (i.e. printers, external hard drives, etc.). Unplug the
power cable from the rear of the power supply on the back of the
computer and disconnect all peripheral devices.
2. Remove the cover from the computer case. Refer to
documentation for your computer system for details.
3. Remove the front cover plate for the 5.25in bay that will contain
the Mobile Rack. Refer to documentation for your computer
system for details.
4. Refer to documentation for your computer system for instructions
on how to mount 5.25in devices into the computer case.
Mounting screws are provided, if necessary.
5. Once mounted in the case, connect the 7-pin SATA data cable from
the motherboard or SATA controller card to the rear of the Mobile
Rack.
6. Connect the 15-pin SATA power cable from the computer power
supply to the rear of the Mobile Rack.
NOTE: An optional 4-pin LP4 Molex power connector is also
available if the computer power supply does not have any available
SATA power connectors.
7. Place the cover back onto the computer case.
8. Insert the power cable into the socket on the power supply and
reconnect all other connectors removed in Step 1.
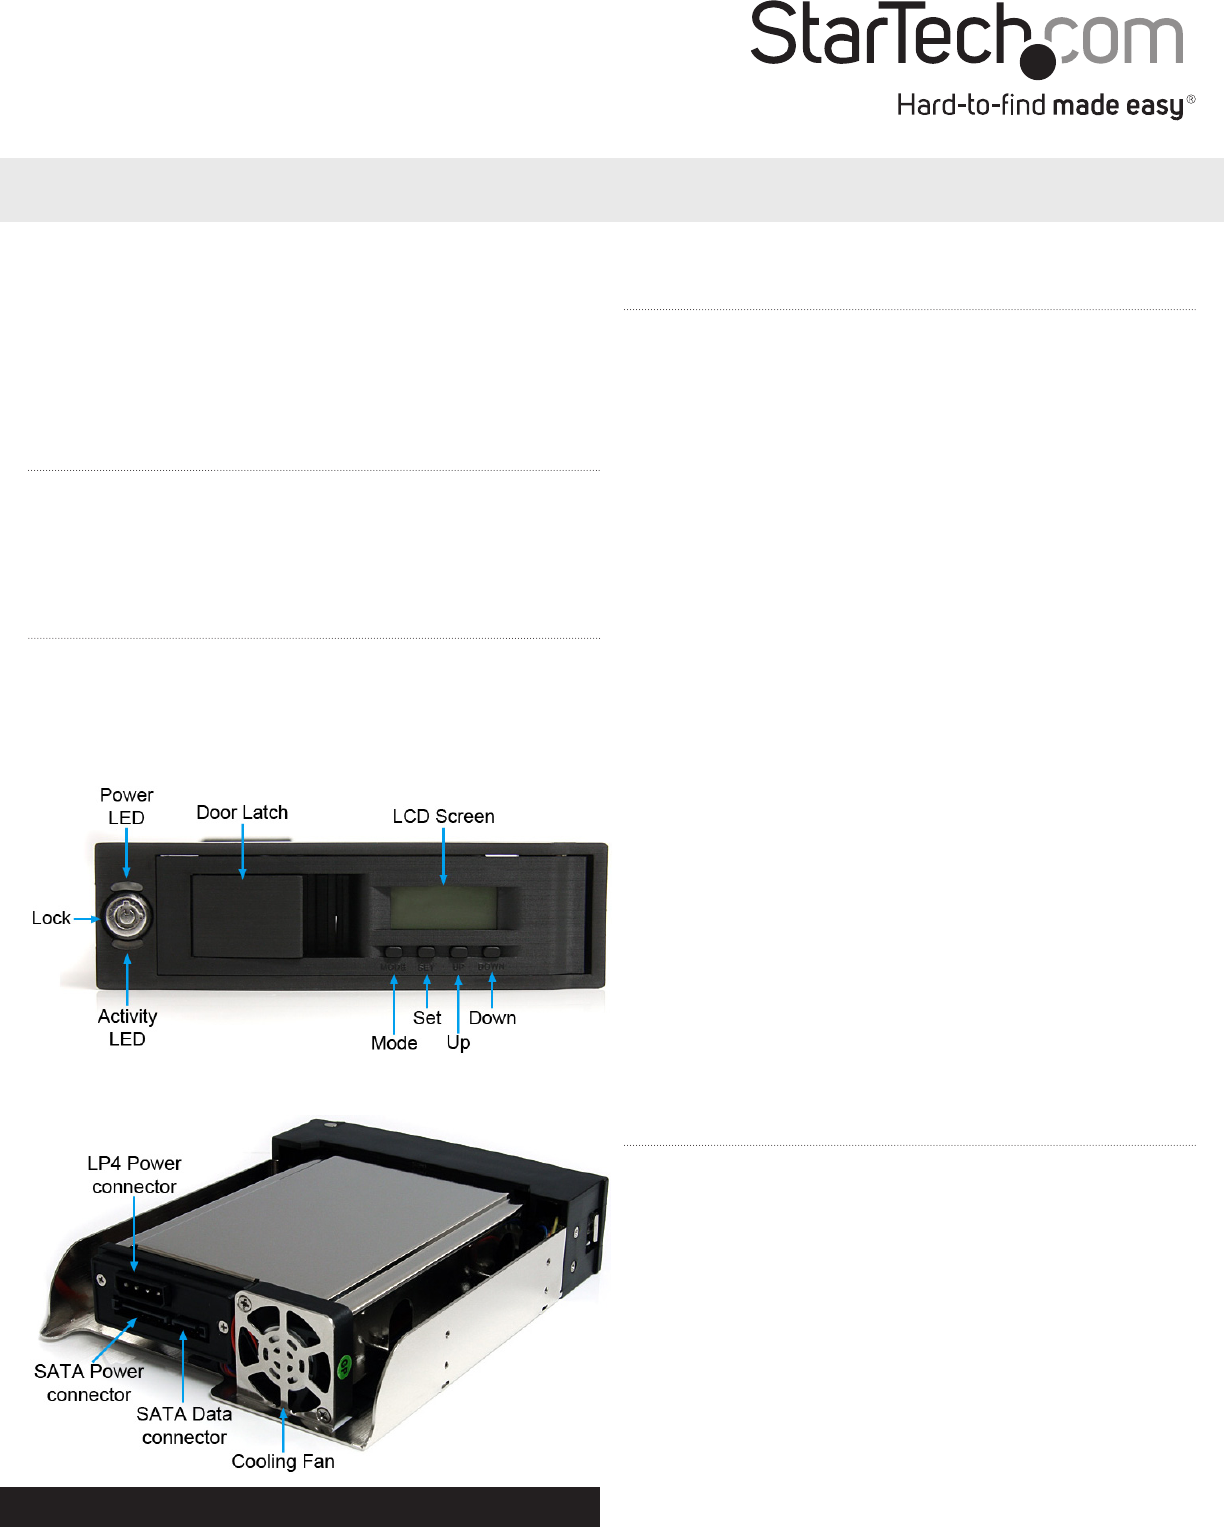
Front View
Rear View
How to Use
Installing A Hard Drive
1. Open the front bay of the Mobile Rack by pulling on the door
release latch. Swing the door fully open.
2. Gently slide the 3.5in SATA hard drive into the bay, connector rst,
with the label facing up.
3. Slide the hard drive at least 3/4 of the way into the bay, then close
the door to fully insert the hard drive. Make sure the door closes
fully, and the latch properly engages.
4. Use the provided key to lock the door on the Mobile Rack.
NOTE: The Mobile Rack will not power up the hard drive unless the
door is locked.


