


Instruction Manual
DE: Bedienungsanleitung - de.startech.com
FR: Guide de l'utilisateur - fr.startech.com
ES: Guía del usuario - es.startech.com
IT: Guida per l'uso - it.startech.com
NL: Gebruiksaanwijzing - nl.startech.com
PT: Guia do usuário - pt.startech.com
Manual Revision: 02/23/2012
For the most up-to-date information, please visit: www.startech.com
PCIVGA7
XGI Volari Z7 16 MB PCI VGA Video Adapter Card
Hardware Guide
1
2
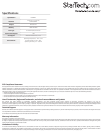
1. D-Sub RGB (VGA) Connector
2. PCI Interface
Introduction
Thank you for purchasing a StarTech.com PCIVGAV7 PCI VGA Video Card.
This convenient video card is fully compliant with PCI 2.2 and provides
high quality 2D display at resolutions of up to 1600 x 1200 pixels.
Features
• Compliant with PCI 2.2 (33/66 MHz)
• Maximum 2D Resolution for 32-bit (1280x1024 @60Hz) and 16-bit
(1600x1200 @ 75Hz)
• Maximum color depth up to 16.7M colors output
Package Contents
• 1 x PCI Video Card
• 1 x Driver CD
• 1 x Instruction Manual
Hardware Installation
1. Make sure that your system is unplugged and you are grounded.
2. Remove the cover of your system (see your computer’s user
manual for details, if necessary) and gently turn your computer
onto its side, so that the PCI expansion slot openings on the
motherboard are facing upwards.
3. Locate an empty PCI slot (usually white in color) and remove the
metal plate that covers the corresponding rear bracket. You may
need a Phillips screwdriver to perform this step. Retain the screw!
You will need it to secure the card later.
4. Gently insert the card into the empty slot, making sure it is rmly seated.
5. Secure the card in place using the screw you removed in Step 3, as
applicable.
6. Replace and secure the computer cover.
Driver Installation
1. Open the Setup.exe le located in the following path: X:\Windows
2000_XP\setup.exe, where X: designates the CD/DVD-ROM drive.
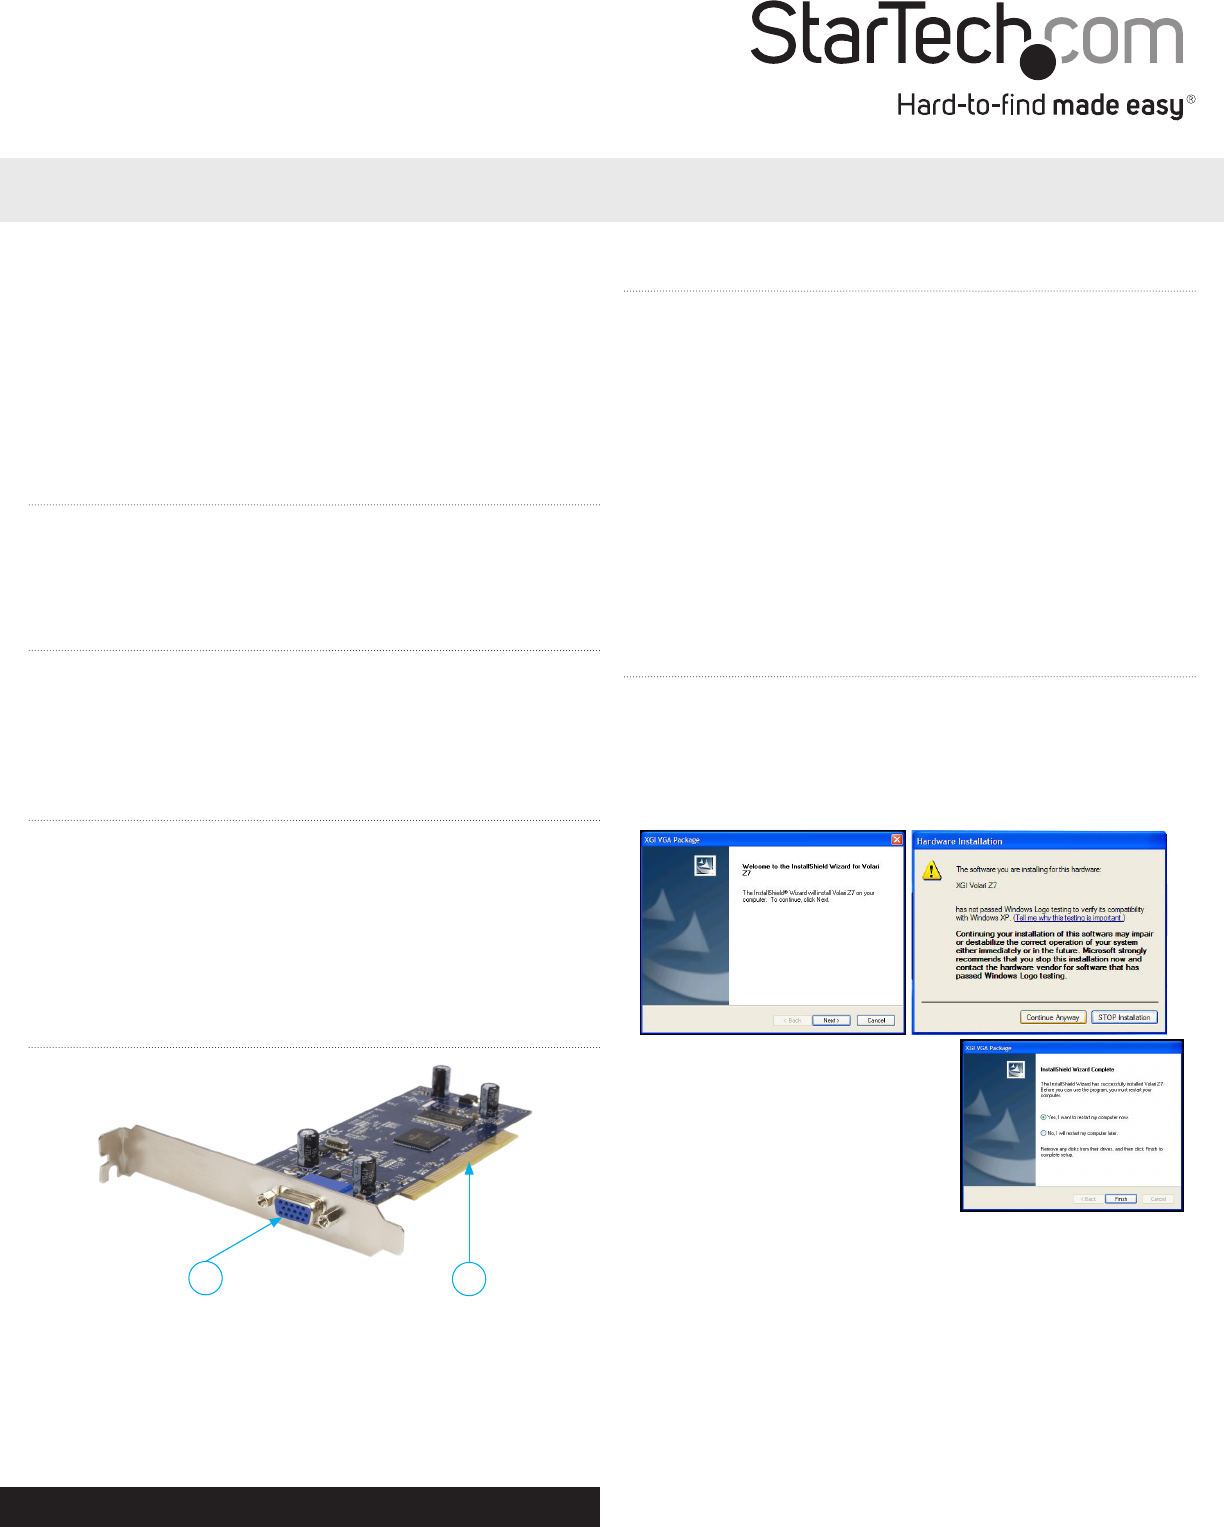
2. When the InstallShield welcome screen appears, click Next. If you
receive a notication that the software has not passed Windows
Logo testing, click Continue Anyway to proceed with the
installation.
3. Once all files have been installed,
select Yes, I want to restart my
computer now, and click Finish to restart
your computer and complete the installation
process. If you wish to verify the installation,
open the Device Manager and check that the
drivers have been recognized.
4. Once the computer has successfully
rebooted, your new VGA port is ready for use.