


1
2
3
4
5
6
7
8
9
10
11
12
8-8
NETWORK SCANNING FUNCTION (USING THE OPTIONAL PRINTER CONTROLLER)
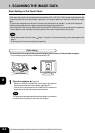
1. SCANNING THE IMAGE DATA (Cont.)
Scan Setting on the Touch Panel (Cont.)
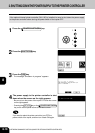
10
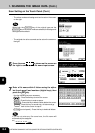
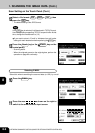
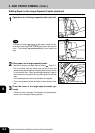
Press the HOLDQUEUE key.
- If you want to store in the ‘Mailbox’ or ‘E-mail’ as well, make
the settings for each destination before pressing the Scan!
key.
Selecting HOLDQUEUE
If you want to use the scanned data at the ‘Command Workstation
TM
’ or ‘WebSpooler
TM
’, select the
HOLDQUEUE key.
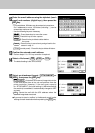
11
Press the Scan! key (or the START key on the
control panel).
- Scanning starts.
- When the originals are set on the original glass continually,
perform the operation on page 8-9.
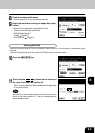
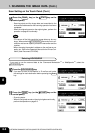
16
Press the Scan! key (or the START key on the
control panel).
- Scanning starts and the image data are transmitted to the
entered mail address after the scanning operation has been
completed.
- When the originals are set on the original glass , perform the
operation on page 8-9 continually.
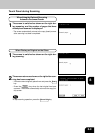
- The volume of the high-resolution image data may be very
large. When selecting ATTACHMENT , be careful not to ex-
ceed the mail server capacity of both the transmitter and the
receiver.
- When changing the sender’s address or the mail server ca-
pacity, etc., refer to the Operator’s Manual for the Printer Con-
troller (User Document CD-ROM).