


6 INTERNET FAX
106 Sending Internet Faxes
7
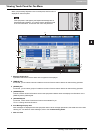
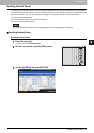
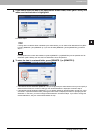
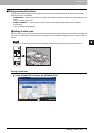
If the screen below appears, place another original on the original glass and press
[SCAN] or the [START] button to continue scanning. If you finish scanning all the
originals, press [JOB FINISH].
y The above screen is not displayed when the original is scanned from the Reversing Automatic Document
Feeder.
y To cancel the operation, press [JOB CANCEL].
y To change the selected settings, press [OPTION].
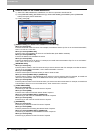
Saving sent data as a file (Internet fax and file)
When sending an Internet fax, you can also save the sent data in the equipment's shared folder and/or a network folder
(REMOTE1 or 2).
y To save the data in a network folder, the administrator needs to set the equipment configuration. For details, refer
to the TopAccess Guide.
y Internet Fax and File is not available when the forced encryption setting is enabled. To learn more about the forced
encryption setting, refer to the MFP Management Guide.
y The sent data can be saved as a file in the equipment's shared folder (MFP LOCAL) only when the hard disk is
installed in the equipment.
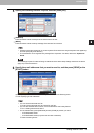
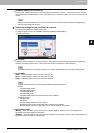
Saving sent data as a file (Internet Fax and File)
1
Refer to “Sending Internet Faxes”( P.103) and follow steps 1 to 5.
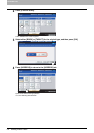
2
Press [STORAGE].