Troubleshooting
Page 43
TESTING CONTROLS AND INPUT TOOLS
If the Grip Pen, or the Cintiq ExpressKeys or Touch Strips do not work as you expect, it is a good idea to
first check the assigned functions or reset them to their default conditions. A quick way to reset a pen to
its default settings is to remove it from the TOOL list by clicking on the list’s [ – ] button. After the pen has
been removed, place it back onto the display screen surface and the pen will be re-added to the TOOL
list with its default settings.
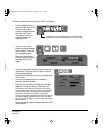
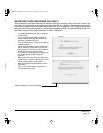
Open the Wacom Tablet control panel and click on the ABOUT button. In the dialog box that appears,
click on the DIAGNOSE... button to open the DIAGNOSTICS dialog box. The DIAGNOSTICS dialog box
displays dynamic information about the Cintiq pen display tablet and pen. This information is used
when testing Cintiq and your input tool.
If more than one Cintiq unit is connected to your system, be sure to select the unit for which you are
testing in the TABLET INFO column.
Note: When testing your tool buttons, if a button is set to POP-UP MENU or OPEN/RUN..., that function will occur
when the button is pressed. In this case you may want to change that button’s function before testing.
TESTING THE EXPRESSKEYS
1. With the DIAGNOSTICS dialog box open, observe the TABLET INFO column as you test the
ExpressKeys. If you have more than one Cintiq unit connected to your system, be sure to select
the unit you are testing from the TABLET INFO column.
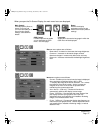
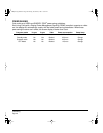
2. Test the keys by clicking them one at a time. Each time you press a key, its number will be
displayed next to either the LEFT KEYS or RIGHT KEYS category, depending on which keys group you
are testing. (See Using ExpressKeys on page 28 for details on the button numbers reported.)
When you are done, click the CLOSE button to exit the dialog box.
TESTING THE TOUCH STRIPS
1. With the DIAGNOSTICS dialog box open, observe the TABLET INFO column as you test each Touch
Strip. If you have more than one Cintiq unit connected to your system, be sure to select the unit you
are testing from the TABLET INFO column.
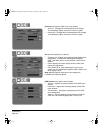
2. Slide your finger up or down along the entire length of the Touch Strip you want to test. As you
touch and move your finger along the Touch Strip, a number will indicate the current finger position
for the respective Touch Strip next to LEFT TOUCH STRIP or RIGHT TOUCH STRIP.
When you are done, click the CLOSE button to exit the dialog box.
Cintiq21UX_Manual.fm Page 43 Monday, November 5, 2007 10:27 AM


