


- 35 -
This document is intended for installing the F2121 on the network using a static TCP/IP address.
Note: If you have not done so, you must enable network connectivity using the Blue Smart Card see Network/LAN kit for
instructions.
Before Starting:
1. Confirm that an existing operational network utilizing TCP/IP is available.
2. Confirm that the Ethernet cable is plugged into the FaxCentre F2121 and into an operational Ethernet port on the
network. Note: the Ethernet cable must be Category 5 and the connector must be RJ45 type. This cable is not
supplied by Xerox.
Configuring F2121 Static IP Address manually: On startup the FaxCentre F2121 defaults to DHCP to obtain its network
configurations, DHCP will be turned off by manually entering a Static IP.
Before Installing:
Record the following information for use during setup:
TCP/IP Address:
Gateway Address:
Subnet Mask:
To obtain this information
contact your Network System
Administrator
Step 1: Power on the FaxCentre F2121.
Step 2:
• Select the M button on the F2121
• Scroll to 2 SETUP and press OK key.
• Scroll to 25 NETWORKS and press OK key
• Scroll to 253 LOCAL NETWORK and press OK key
• Scroll to 2531 CONFIGURATION and press OK key
• Scroll to 25311 MANUAL and press OK key at this point it may say “Please Wait”
Step 3: Select the M button and type 2532 this will take you to IP ADDRESS. Enter your IP address -IP addresses are
divided into four octet fields. Pad the IP address with leading zeros to fill out the octet fields.
Eg. 192.010.025.004 would be a valid IP address configuration.
Step 4:
• Select the M button and type 2533 this will take you to the SUBNET MASK. Type in the subnet mask and press
OK key.
• Select the M button and type 2534 this will take you to the GATEWAY. Type in the default gateway associated
to the IP address for the FaxCentre F2121 and press OK key.
Step 5: Print out the List of Parameters Page.
To Print the List of Parameters Page:
• Select the M button on the F2121
• Scroll to 5 PRINT select OK,
• Scroll to 54 SETUP then select OK.
The List of Parameters Page will print out.
Confirm on the printout that the IP Address,
Subnet Mask, and Gateway are correct.
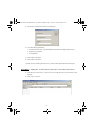
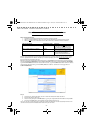
Step 6: From a workstation, open your Internet Explorer browser. Type in the URL http://xxx.xxx.xxx.xxx (where the xxx’s
represent the FaxCentre F2121 device’s IP address). If connected properly you should be presented with the FaxCentre
F2121 device’s Internet Services web page. . If the Internet Services web page does not appear then test connectivity by
pinging the IP address of the FaxCentre F2121 or contacting the local network administrator.
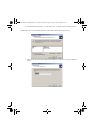
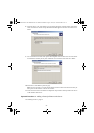
Step 7: Load the Print Drivers on the workstations that will be accessing the FaxCentre F2121 device.
NETWORK SETUP (MANUAL IP)
LU 252813189 Kit Laser Multifonction LAN XEROX GB.book Page 35 Lundi, 27. novembre 2006 4:47 16