


Connecting the Ground Wire 23
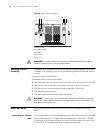
6 Push the ejector levers inward and push the handle bar pin into the positioning
hole in the chassis.
7 Fasten the module’s captive mounting screws into the holes in the chassis with a
screwdriver.
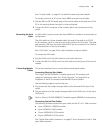
Connecting the
Ground Wire
To connect the ground wire:
1 Wear an antistatic wrist strap.
2 Remove the screw from the grounding hole in the switch chassis.
3 Set the ground wire connector around the grounding screw.
4 Fasten the grounding screw in the hole on the chassis.
5 Connect the other end of the ground wire to the grounding bar of the switch.
If you install the switch in a rack, 3Com recommends that the ground wire of the
switch be connected to the grounding bar of the rack.
WARNING: The resistance between switch chassis and the ground should be less
than 1 ohm.
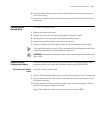
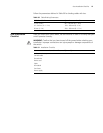
Connecting and
Configuring Power
The Switch 8800 power supply has one power cord. Use the procedures in the
following sections to connect and configure power to your Switch 8800.
Connecting AC Power
Cords
To connect the AC power cord:
1 Power off all the related parts of the switch before connecting the AC power cord
2 Plug the power cord into the socket in the switch and attach the retention clip to
the power cord plug.
3 Plug the other end of the cord into a socket strip with surge protector. Connect
the strip to the power source in the room.
Figure 9 illustrates the power cord connection for the Switch 8800.