


Installation Guide
8
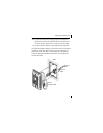
Installing the Network Jack
Installing the Network Jack consists of the following steps:
1
Set up the power supply (page 10).
2
Set the Power Over Ethernet dip switches (page 13;
optional, required only if your network supports Power
Over Ethernet or if you are using a single-port or multi-port
power supply).
3
Install the adapter plate and pass-through ports (page 15;
optional).
4
Plan the installation (page 17).
5
Set up the network cabling at your site (page 19).
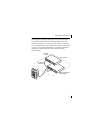
6
Connect the Network Jack to the network (page 19).
7
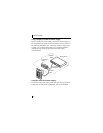
Mount the Network Jack to the wall or office cubicle
(page 22).
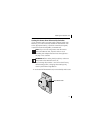
VoIP telephone
power cable
For powering a VoIP telephone on a
network that uses Capacitive Power
Discovery Process-compatible Power
Over Ethernet.
Check the 3Com
web site
Network Jack
Tester
For verifying the Network Jack
installation; useful if installing
multiple Network Jacks.
3CNJTESTER
Component Purpose 3C Number(s)