


3M
™
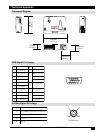
Personal Projector MP8746/MP8747
26
© 3M IPC 2000
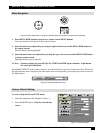
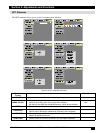
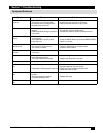
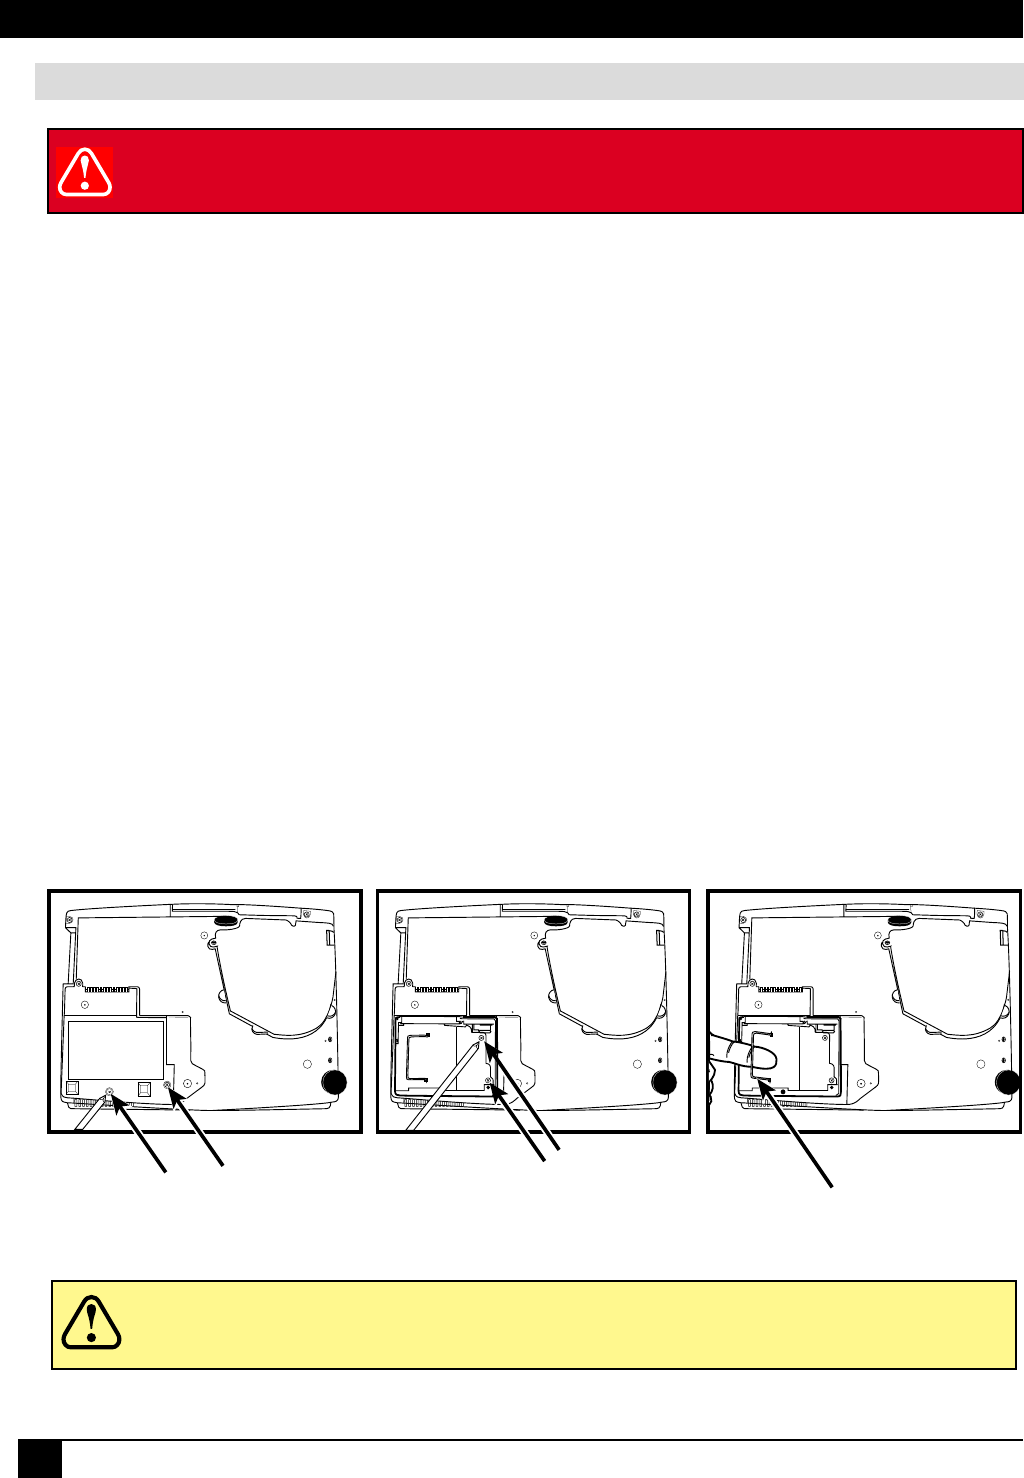
Replacing the Lamp
WARNING
✔ Note: For maximum lamp life, do not shock, handle or scratch the lamp glass when it is
hot. Do not use an old or previously used lamp as a replacement lamp.
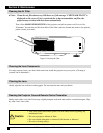
1. Remove lamp access door: The lamp access door is located on the bottom of the machine. Use a flat-
head screwdriver to remove the two screws from the lamp access door. Lift off the lamp access door and
set it aside.
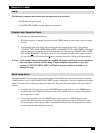
2. Use the screwdriver to remove the lamp module retaining screws.
✔ Note: These screws are self-containing screws that cannot be removed from the lamp module
or access door.
3. Remove lamp module: Carefully slide the lamp module out by pulling straight up on the retaining wire
on top of the module.
4. Insert lamp module: Carefully insert the new lamp module by sliding it straight down into the opening.
Ensure that it is fully seated. Reinsert and tighten the lamp module retaining screws to secure the lamp
module in place.
5. Insert the hinge tabs on the bottom of the lamp access door, and close. Reinsert and tighten the two
screws to secure the lamp access door.
✔ Note: Reset the lamp operation hours. See the previous page for details.
Section 6: Lamp
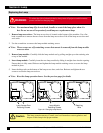
Figure 6.1 Changing Lamp Module
WARNING
To reduce the risk of electrical shock, always turn off projector and disconnect
power cord before changing lamp.
Caution
This lamp contains mercury. Consult your local hazardous waste regulations and
dispose of this lamp in the proper manner.
Lamp Access Door
Retaining Screws
Lamp Module
Retaining Screws
Retaining
Wire