


2 3M 1700 Operator’s Guide
Main Menu
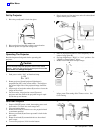
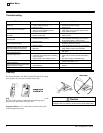
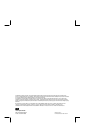
Set Up Projector
1. Raise the post (1) until it locks into place.
2. Raise projection mirror (2) to adjust screen elevation.
3.
Remove power cord (3) from storage area.
4.
Plug in power cord into projector and wall outlet (4) and
depress on/off power switch.
Operating The Projector
Read the Important Safeguards before operating this
projector.
Caution!
Do not illuminate lamp with projection mirror in the closed
position. Heat from the lamp may produce parts that are hot
to the touch and damage the optics.
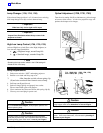
1. Push power switch “ON” to illuminate lamp.
|=ON
O =OFF
2. Rotate projector (1) until projected light beam is
perpendicular (90
°) to the screen surface. The height at
the left and right sides of the projected image should be
equal.
3.
Adjust angle of projection mirror (2) to raise or lower the
image on the screen.
4.
For best results, tilt projection screen (3) toward
projector until the width of the projected image is equal
at both the top and bottom.
5.
Place LCD projection panel or film transparency in the
center of stage glass (4).
6.
Set lamp brightness to “High” or “Low” position. See
“High/Low Lamp Control” below.
7.
Rotate focus knob (5) for sharpest image.
8.
If yellow/orange or blue colors appear in corners of
image, rotate color tuning dial to remove colors. See
Color Tuning.
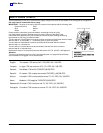
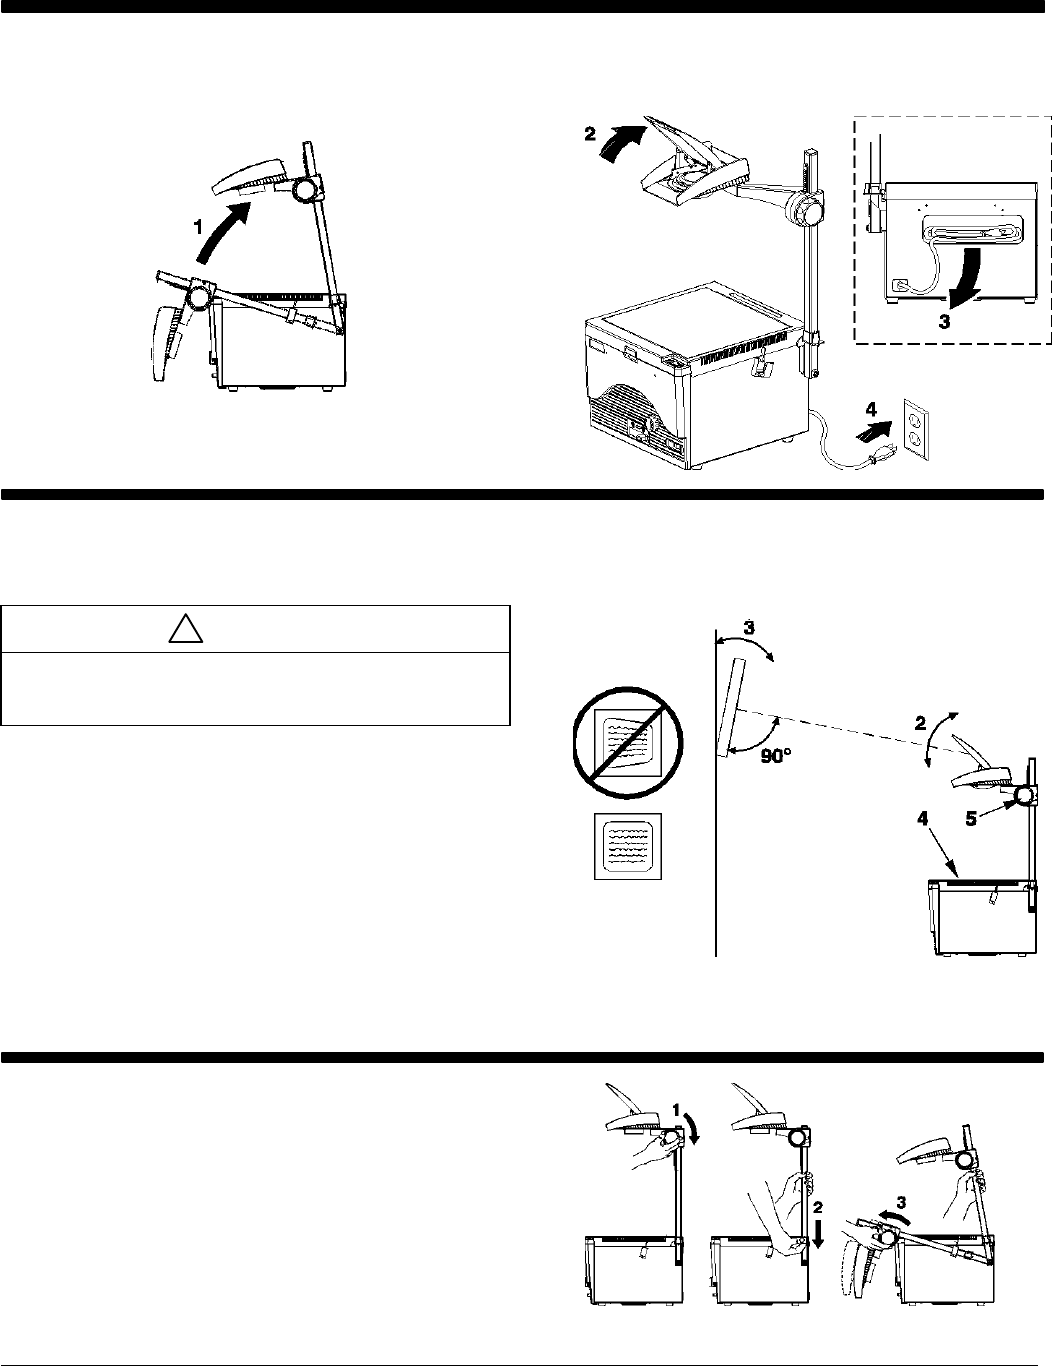
Fold Down Projector
1. Depress ON/OFF power switch, then unplug power cord
from outlet. Coil cord into cord storage area.
2.
Close projection mirror.
3.
Rotate focus knob (1) clockwise to raise projection head
to maximum position.
4.
Release post latch (2) and lower post until it locks in the
post cradle.
5.
Rotate focus knob (3) counterclockwise to lower head
until it stops.
6.
To move the projector, lift it from the bottom.