


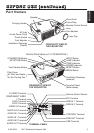

VIDEO IN
S-VIDEO IN
AUDIO
IN
AUDIO OUT1
12
2USB
RGB IN
RGB OUT
CONTROL
CR/PR
COMPONENT VIDEO
CB/PB Y
AUDIO
IN
RL
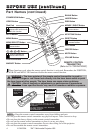
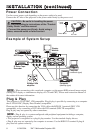
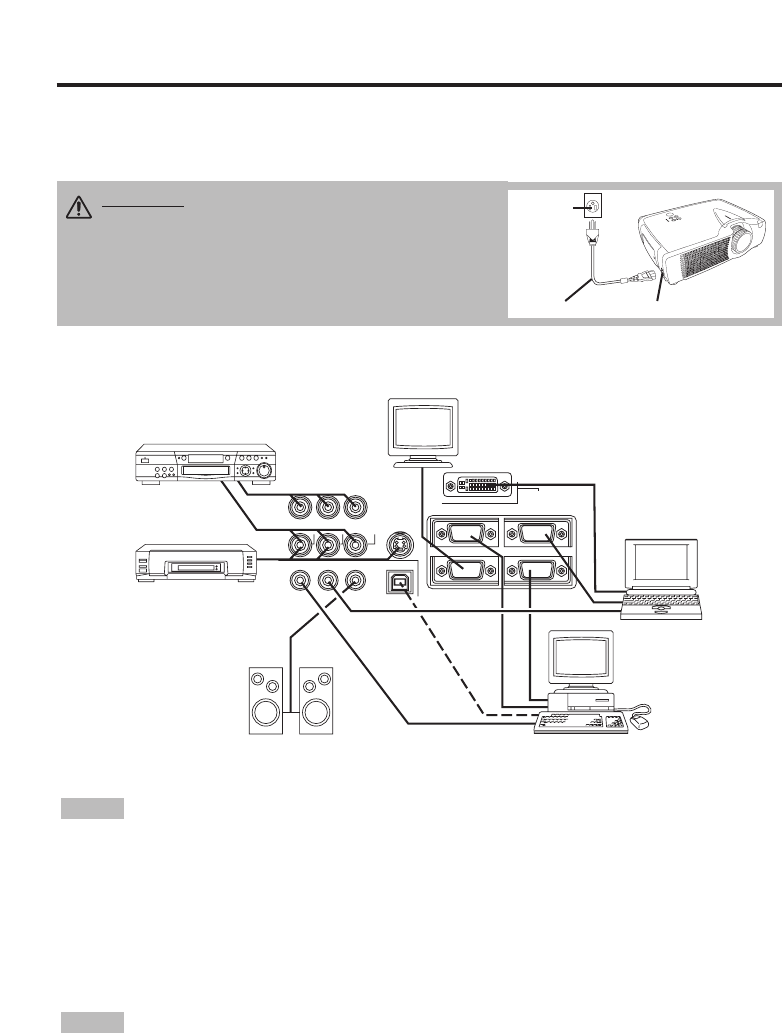
Example of System Setup
S-Video Tape
Recorder
Computer
(notebook type)
• When connecting with a notebook computer, set the proper RGB external image output
(setting CRT display or simultaneous display of LCD and CRT). Please read instruction manual of
the notebook for more information.
Plug & Play
This projector is VESA DDC 1/2B compatible. Plug & play is possible by connecting to a computer
that is VESA DDC (Display Data Channel) compatible.
Please use this function by connecting the VGA cable with RGB IN 1 terminal (DDC 1/2B
compatible), or by connecting a DVI cable with DVI terminal (DDC 2B compatible).
Plug & play may not operate by other connections.
• Plug & play is a system configured with peripheral equipment including a computer,
display and an operating system.
• This projector is recognized as a plug & play monitor. Use the standard display drivers.
• Plug & play may not operate by the computer to connect. Use the RGB IN 2 terminal if plug &
play does not operate correctly.
NOTE
NOTE
8 © 3M 2004. 3M™ Multimedia Projector X65
II
II
NN
NN
SS
SS
TT
TT
AA
AA
LL
LL
LL
LL
AA
AA
TT
TT
II
II
OO
OO
NN
NN
((
((
cc
cc
oo
oo
nn
nn
tt
tt
ii
ii
nn
nn
uu
uu
ee
ee
dd
dd
))
))
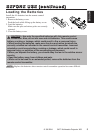
Power Connection
Use the correct power cord depending on the power outlet to be used.
Connect the AC inlet of the projector to the power outlet firmly by the power cord.
AC Inlet
Power Cord
Power
outlet
Speaker with
amplifier
Display
Monitor
CAUTION • Be carful in handling the power
cord according to instructions of the "Product
Safety Guide" and this manual.
• Connect the power cord firmly. Avoid using a
loose, unsound outlet or failed contact.
Computer
(desktop type)
DVD Player