CHAPTER 3: Replacing notebook components
90
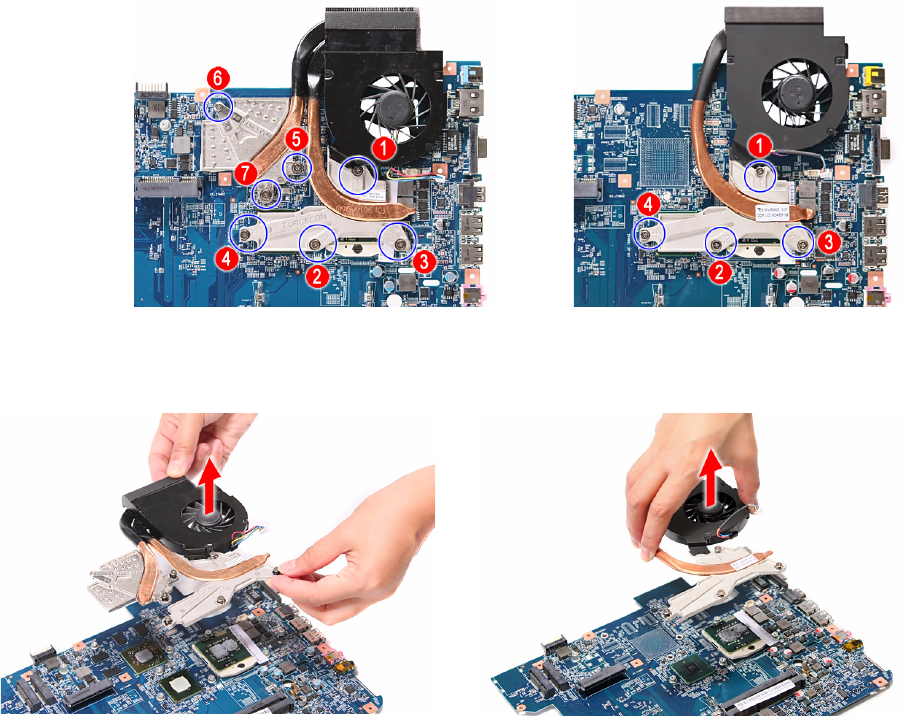
5 Loosen the spring-loaded captive screws securing the cooling assembly.
Follow the screw sequence indicated on the below images.
6 Remove the cooling assembly from the system board.
7 Lay the cooling assembly down in an upright position to avoid tainting your
work space with thermal grease.
Discrete model UMA model
Discrete model
UMA model


