


31
English
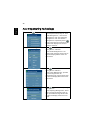
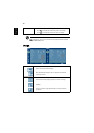
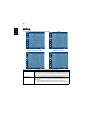
Aspect Ratio
Use this function to choose your desired aspect ratio.
• Auto: Keep the image with original width-higth ratio and maxi
mize the image to fit native horizontal or vertical pixels.
• Full: Resize image to fit full screen by width (1280 pixels) and
height (800 pixels).
• 4:3: The image will be scaled to fit the screen and displayed using
a 4:3 ratio.
• 16:9: The image will be scaled to fit the width of the screen and
the height adjusted to display the image using a 16:9 ratio.
• L.Box: Keep original signal aspect ratio and zoom in by 1.333
times.
<Note> "Full" and "L.Box" funcions are supported in P1300WB/
P1303W.
Auto Keystone Automatically adjusts vertical image.
Manual Keystone Adjust image distortion caused by tilting projection. (±40 degrees)
<Note> The Manual Keystone funcion is unavailable under Auto
Keystone setting to "On".
H. Position
(Horizontal
position)
• Press to move the image left.
• Press to to move the image right.
V. Position
(Vertical position)
• Press to move the image down.
• Press to move the image up.
Frequency "Frequency" changes the projector's refresh rate to match the
frequency of your computer’s graphics card. If you can see a vertical
flickering bar in the projected image, use this function to make the
necessary adjustments.
Tracking Synchronizes the signal timing of the projector with the graphics card.
If you experience an unstable or flickering image, use this function to
correct it.
Sharpeness Adjusts the sharpness of the image.
• Press to decrease the sharpness.
• Press to increase the sharpness.
3D Choose "On" to enable DLP 3D function.
• On: Choose this item while using DLP 3D glasses, quad buffer
(NVIDIA/ATI…) graphic card and HQFS format file or DVD with
corresponding SW player.
• Off: Turn off 3D mode.
3D Sync L/R If you see a discrete or overlapping image while wearing DLP 3D
glasses, you may need to execute "Invert" to get best match of left/
right image sequence to get the correct image (for DLP 3D).