


Vll
19
Configuring File and Print Sharing
Vll
18
Configuring File and Print Sharing
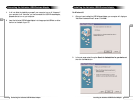
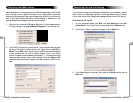
4. In the following screen please select File and printer sharing for Microsoft
Networks from the given list.
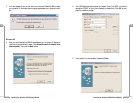
5. In the “File and Print Sharing” screen make sure that both of the selection have a
check mark beside them. If they do not please click on the box next to each state-
ment and then click OK.
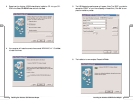
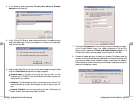
6. After you have clicked OK you will return to the network screen from step 2. Please
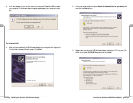
click on the Identification tab (see the first image on page 26).
Computer Name: In this field you can type any name you want. (i.e. My
Computer, John, CPU654) Do not use the same name for each computer you
wish to have on your network.
Workgroup: This field enables you to set a unique name for your network. This
name must be set up on every other computer you wish to have on your net-
work.
Computer Description: You can enter anything you wish. Traditionally, the
location name or main user’s name is used in this field.
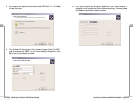
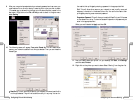
7. Click on the Configuration tab. This will take you back to the screen from step 2.
In the “Primary Network Logon:” box, located just above the “File and Print
Sharing” button, make sure that Client for Microsoft Networks is selected. If it is
not then click the down arrow and select it from the given list. Click OK.
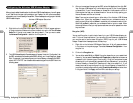
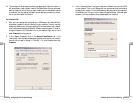
8. A screen will appear asking you to restart your computer. Click Yes to restart the
computer. If you do not see this screen please restart your computer manually. After
your computer restarts you will be asked to supply a User Name and Password.
Enter whatever you would like but be sure to write down these values, as they will
enable you to access your network.