


10
Actiontec Wireless Network Attached Storage Device User Manual
11
Chapter 2 Configuring the NAS Device
USB Devices
A USB hard drive or USB Memory Disk (flash memory disk) can be inserted in the
NAS Device’s USB port at any time. Once the USB LED on the front panel comes on
and stays on, the USB device is available for use.
For a USB hard drive, the Device can recognize the FAT and NTFS file formats.
Removing a USB device - Method A (USB Hard Drive)
1. Press the “USB Eject” button on the rear panel. The NAS Device beeps.
2. Wait for the USB LED to start blinking slowly.
3. Remove the USB device.
Removing a USB device - Method B (USB Flash Drive)
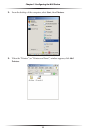
1. Click the Flash Utility icon in the computer desktop’s system tray.
2. Select Safely Remove Drive.
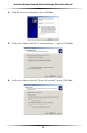
3. Select the desired NAS Device.
4. Click Eject.
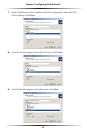
5. Wait for the USB LED to start blinking slowly. (The program will also display a
message when it is safe to physically detach the USB device.)
6. Remove the USB device.
☞
Note: If the USB device is not removed, it will not be re-con-
nected. The USB device must be removed and re-inserted to re-
connect.
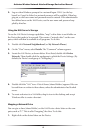
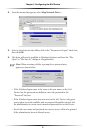
Adding a Print Server
If a USB printer is connected to the NAS Device, the Device can be used as a print
server. To do this, follow these instructions (this installation is for Windows XP
only; other operating systems may have a slightly different procedure):
1. Plug a USB printer in the USB port on the rear panel of the NAS Device.