


www.addonics.com Technical Support (M-F 8:30am - 6:00pm PST) Phone: 408-453-6212 Email: www.addonics.com/support/query/
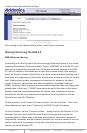
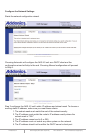
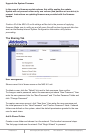
FTP Server
The NAS 4.0 FTP server works by offering a private “home” folder to each user with
exclusive access to the resources through FTP. FTP cannot be used to access shares
defined under the Sharing tab in the web interface. Each user will also have access to
their private FTP space using SMB.
Getting Started with MLDonkey
MLDonkey is a powerful, multi-protocol Peer-to-Peer (P2P) client included with the
NAS 4.0 unit. The features and capabilities of this tool are beyond the scope of this
user guide, the steps below will show how to get MLDonkey up and running. For more
information on how to use MLDonkey, visit http://mldonkey.sourceforge.net.
MLDonkey Basic Setup
The MLDonkey client requires one partition formatted with either ext3 or XFS. The
NAS 4.0 unit's format utility can format one physical unit with a single partition using
all space if needed.
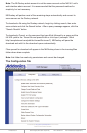
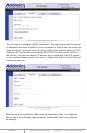
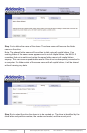
Under the P2P/MLDonkey tab, choose the drive you wish to create the file structure
on and click Save. Please note: this menu will permit setting up folders on
incompatible file systems. If this is done, MLDonkey will not start or may not be able to
download files.
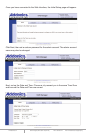
When the folder structure is set up, a page will appear stating this is done. Click the
START button. NOTE: The MLDonkey setup page will create a share on the selected
drive called MLDonkey. This share will be configured with “None” permissions to
“Everyone” as well as all existing users.
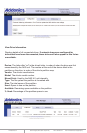
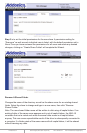
Next, a new page will appear stating MLDonkey is running. Click the link at the bottom
of the page that reads “Launch MLDonkey Control Panel.”
A new tab will appear in the browser with the MLDonkey web interface. If MLDonkey is
not fully initialized yet, the browser may report a failure to connect. If this happens,
wait about one minute and try again, either by refreshing the page or clicking a “try
again” button – this step varies depending on the browser used.
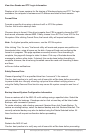
When first setting up, a prompt appears warning there is no password for the admin
account. Click the space between the “DL” and “Input” buttons, then type the
command “useradd admin” as shown, then add a password after a space.