


4
DRIVER INSTALLATION
PC:
1. Insert the included software DVD into your computer's DVD-ROM drive.
2. On the window that appears after you insert the disc, click "Install" for your computer's operating
system (Windows XP/Vista/7 32-bit or 64-bit).
If this window does not automatically appear, double-click "My Computer" then double-click the name
of the DVD. The window should appear.
If the window still does not appear, right-click the name of the DVD and select "Explore." Once the
DVD's contents are shown, double-click "Alesis.exe."
3. Follow the on-screen instructions that appear to install the software.
4. Click Exit to close the window.
MAC:
1. Insert the included software DVD into your computer's DVD-ROM drive.
2. Double-click the DVD.
3. Double-click the "Mac OS X USB 2.0 Driver" folder.
4. Double-click the "AlesisUSB2_Driver_2.0.2 beta.dmg" file.
5. Follow the on-screen instructions that appear to install the software.
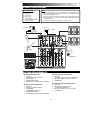
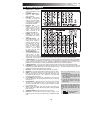
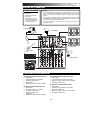
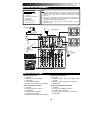
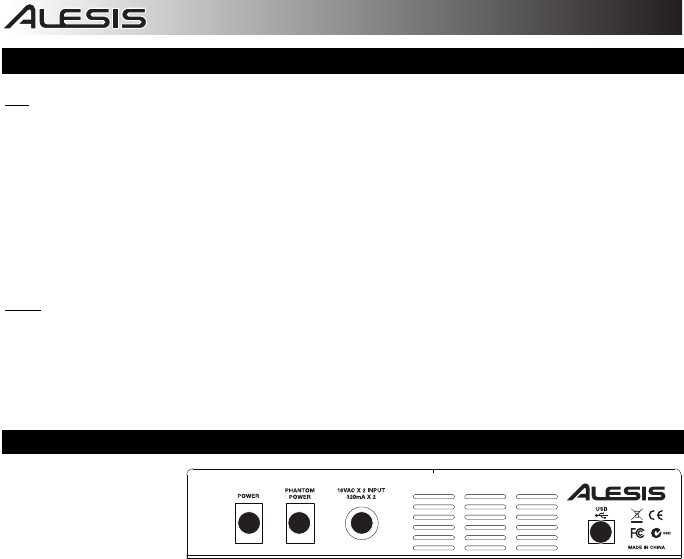
REAR PANEL FEATURES
1. POWER IN – Use
the included power
adapter to connect
the MULTIMIX 8
USB 2.0 FX to a
power outlet. While
the power is switched off, plug the power supply into the MULTIMIX 8 USB 2.0 FX first, then plug the
power supply into a power outlet.
2. POWER SWITCH – Turns the MULTIMIX 8 USB 2.0 FX on and off. Turn on the MULTIMIX 8 USB 2.0
FX after all input devices have been connected and before you turn on amplifiers. Turn off amplifiers
before you turn off the MULTIMIX 8 USB 2.0 FX.
3. PHANTOM POWER – This switch activates and deactivates phantom power. When activated,
phantom power supplies +48V to the XLR mic inputs. Please note that most dynamic microphones do
not require phantom power, while most condenser microphones do. Consult your microphone’s
documentation to find out whether it needs phantom power.
4. USB PORT – Use the included cable to connect the MULTIMIX 8 USB 2.0 FX to a computer.
MULTIMIX 8 USB 2.0 FX requires a USB 2.0 connection.
12 3
4