


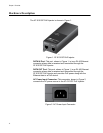

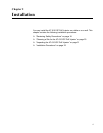
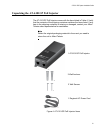


Chapter 2: Installation
22
Installation Procedures
Depending on where you install the unit. perform the following procedures
when installing the AT-6101GP PoE Injector:
”Table Top Installation” or ”Wall Installation”
“Ethernet Cable Installation” on page 23
“AC Power Cord Installation” on page 24
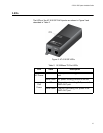
Table Top
Installation
For installation of the AT-6101GP PoE Injector on a table top, perform the
following procedure:
1. Position the AT-6101GP PoE Injector on a table top so it that conforms
to the guidelines listed in “Choosing a Site for the AT-6101GP PoE
Injector” on page 20.
2. Go to “Ethernet Cable Installation” on page 23 for the next step in the
installation.
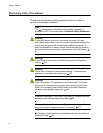
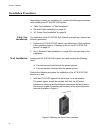
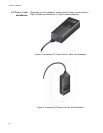
Wall Installation Installing the AT-6101GP PoE Injector on a wall requires the following
items:
Two wall screws (included with the power injector)
Two wall anchors (included with the power injector)
Perform the following procedure for installation of the AT-6101GP PoE
Injector on a wall:
1. Hold the AT-6101GP against the wall where it is to be installed.
The power injector should be oriented such that the AC power
connector is facing up and the Ethernet connectors are facing down.
Use a pencil or pen to mark the wall locations of the mounting screw
holes as illustrated in Figure 5.
Figure 5. Marking the Screw Hole Locations