


Removable Power Supply and Fan
8
Installing a PWR05 or FAN03
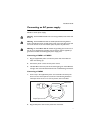
1. If you are replacing a PSU, turn off the main power source to the PSU and
disconnect the power cord before removing it.
The DC earthing connection is not necessary for the SwitchBlade x908 when
using AC PSUs because the chassis is grounded through the power cords.
2. Remove the current PSU, fan module, or blanking plate from the switch.
Using a screwdriver, loosen the captive screw(s) until fully loosened.
If a unit is already in the bay, slide it out slowly and carefully. Support the
unit from underneath as you remove it to prevent it from falling.
Avoid the spinning blades on chassis fan modules. Contact may cause
personal injury or damage the unit.
Cover empty bays because dust and debris could overheat or damage the
unit and switch. Do not operate the switch for extended periods without
functioning chassis fan modules. Doing so will cause the switch to overheat
and shut down, and may damage the switch.
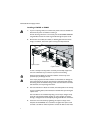
3. Insert the new PSU or chassis fan module, and carefully slide it into the bay.
If you are installing a PSU, unlock the latch on the PSU first by loosening the
captive screw.
Insert the PSU or fan module slowly, being sure to keep it straight. Firmly
press the unit until the faceplate engages, or nearly engages, the chassis.
Forcing a misaligned unit into the bay may damage both the unit and chassis.
4. Secure the unit in the switch by tightening the captive screw(s) on the
faceplate. On the PWR05, use a screwdriver to tighten the captive screw
such that a screwdriver will be required to remove the PSU at a later date.
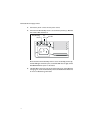
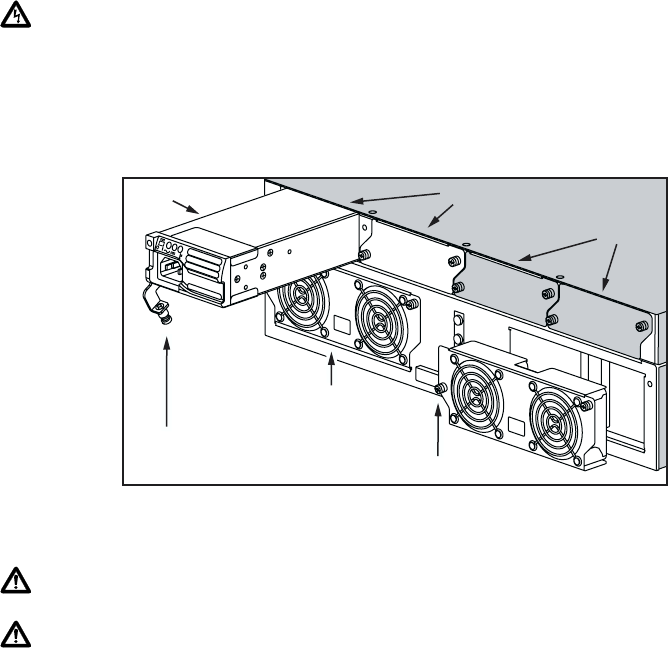
Captive screw
PSU bays
PSU
Captive screw
Chassis fan
Service
access
panels