2
Input cables
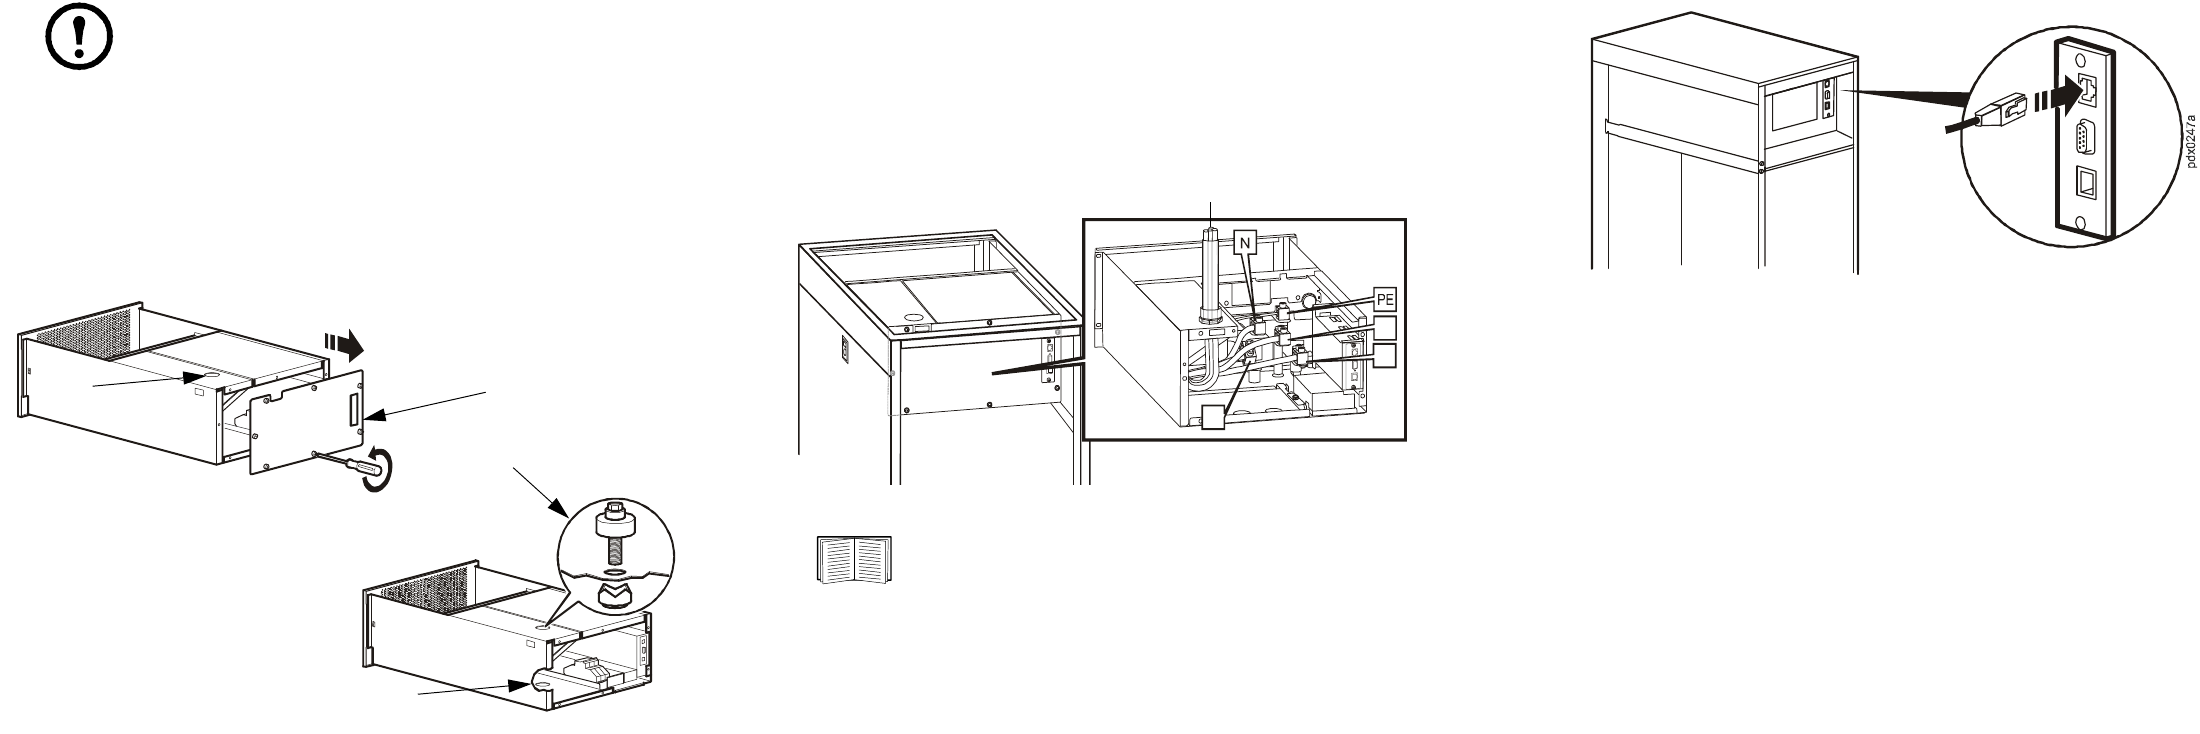
Enlarge the knock out hole for larger conduit
Note: The cutout on the top (or bottom) cover plate may need
to be enlarged depending on the installation requirements.
1
If the conduit size for your installation is too large for the conduit
access knock out, the hole must be enlarged.
2
Loosen the seven screws and remove the back panel.
3
Use an electrician’s punch to enlarge the knock out hole to the size
needed.
4
If power is run from the bottom of the rack, enlarge the knock out
hole in the bottom of the unit.
Install input cables
1
Loosen the seven screws and remove the back panel to gain access to
the compression terminals (the top and bottom cover plates can be
removed if necessary for easier access).
2
Connect the Protective Earth/Ground (PE/G), neutral (N), and line
(L1, L2, and L3) conductors to the appropriate compression
terminals and conduits.
3
Reinstall the any panels that were removed.
Please refer to the Power Distribution Modules Installation
sheet for information on how to install APC Power
Distribution Modules (PDMs).
Communication cables
Connect one end of the communication cable to the port on the back of
the unit and the other to the local area network.
pdx0363a
pdx0365a
2
3
4
1
L3
L1
L2
Conduits
2


