Xserve Power Supply -
5
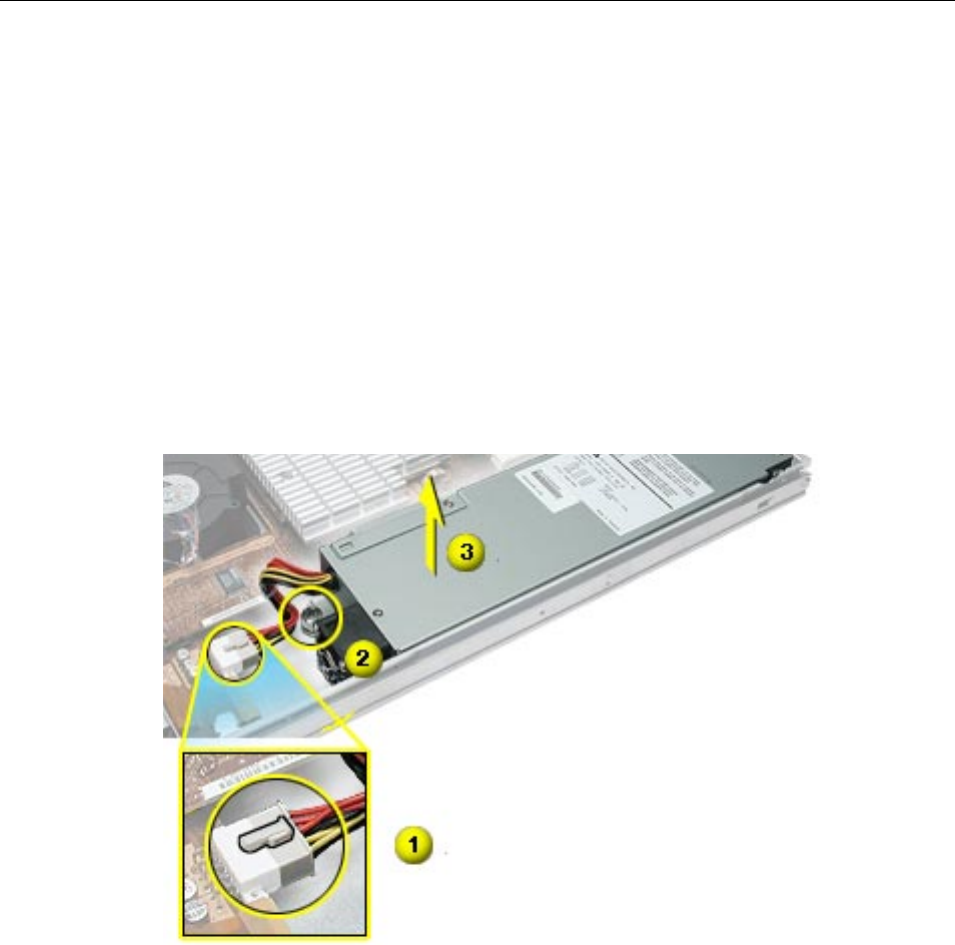
3. Release the locking latch on the power supply cable connector and disconnect the
cable from the drive interconnect board.
(Figure 4)
4. Release the thumbscrew that secures the power supply to the chassis.
Note:
The thumbscrew is captive; you cannot remove it.
5. Grasp the metal flange of the power supply’s connector (on the left side) and lift up to
disconnect the power supply from the logic board.
Note:
You may need to loosen the left side of the power supply and then lift at
another point near the front to disengage it. Do not lift the small lip that contains the
thumbscrew.
6. Holding the power supply in both hands, remove it from the server.
Figure 4
Installing the Replacement Power Supply
1. Angle the replacement power supply into the bottom housing, so that the back end of
the power supply fits against the inside back wall of the housing.
2. Press straight down to connect the power supply to the logic board.
3. Tighten the thumbscrew that secures the power supply to the chassis.
4. Connect the power supply cable to the drive interconnect board.
5. If necessary, replace the heatsink duct.


