


FLASH UPGRADE USER GUIDE IMPRESSION A10+/A9+/A8+
PROXIMA ASA 5
4. CONNECTING THE CABLES
The Flash upgrade is done via the serial mouse port on the projector. This is the
communication interface from the computer to the projector. All PC/notebooks are equipped
with serial interface connectors, and may thus be used for this purpose.
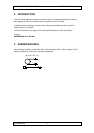
1. Connect the computer to the projector using the regular VGA cable. IMPORTANT: Do
not connect the mouse &adapter cable at this point, as it will be seen from the
computer as a mouse connection. Connect the power cord.
2. Switch on the projector.
3. Switch on the computer. The projector should now show the image of your computer
screen.
4. Connect the mouse cable and adapter between computer and the projector. Do not
switch off the projector or the computer at this stage. The cable/adapter connects to the
RS-232 serial port on the computer, and the dedicated mouse port on the projector.
Make sure that your computer does not recognise the established connection as
a mouse device. Moving the trackball on the remote can check this; the mouse
pointer should not move. Also execute factory reset on the projector to go to
default communication settings.
5. CONFIGURING THE HYPERTERMINAL SOFTWARE
On the PC side, software that can perform a “terminal emulation” is needed. This is a
standard component in most operating systems, and it is also available as stand alone
software. Norton PCAnywhere and Norton Commander are two programs that can do this. As
it is a standard component in the Windows Operating System. However we recommend that
Hyperterminal is used. This can normally be found in the accessories menu. This example
uses this software to explain.
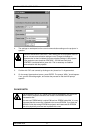
1. Start Hyperterminal.
2. Enter a name for the connection you are about to make. Any name can be used, we
recommend using a name that is easy to remember, as you will be able to save and
recall this file later. Choose an icon for the file.
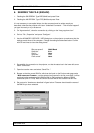
3. Under “Connect using” select the COM port that you have connected the cables to.
Please note that this differs from computer to computer, but as the cables need to be
connected directly to the port, a selection that lists “direct to COM x”, where x is the
selected port, is correct. Normally this is COM 1 or COM 2. See below figure for
reference.