


Chapter 3 69
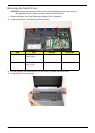
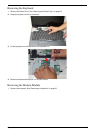
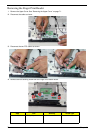
Removing the LCD Module
1. Remove the Battery Pack. See “Removing the Battery Pack” on page 46.
2. Remove the SD dummy card. See “Removing the Lower Covers” on page 49.
3. Remove the Express dummy card. See “Removing the Lower Covers” on page 49.
4. Remove the Lower Covers. See “Removing the Lower Covers” on page 49.
5. Remove the DIMM Modules. See “Removing the DIMM Modules” on page 50.
6. Remove the WLAN Module. See “Removing the WLAN Module” on page 54.
7. Remove the HDDs. See “Removing the Hard Disk Drive1 Module” on page 55. See “Removing the Hard Disk
Drive2 Module” on page 58.
8. Remove the ODD. See “Removing the Optical Drive Module” on page 60.
9. Remove the Modem Module. See “Removing the Modem Module” on page 65.
10. Disconnect the Antenna, MIC and Speaker cables. See “Removing the Antenna, MIC and Speaker Cables” on
page 67.
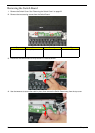
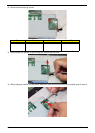
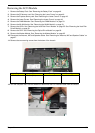
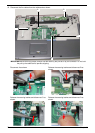
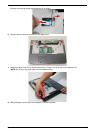
11. Remove the two securing screws from the bottom of the chassis.
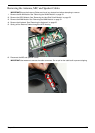
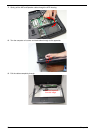
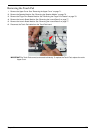
12. Turn the computer over. Use the tweezers to disconnect the LCD interface cable from the chassis.
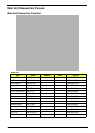
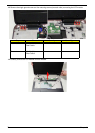
Step Size Quantity Screw Type
LCD Module M2.5*6.5(NL) 2