14
ASUS CRW-4824A User’s Manual
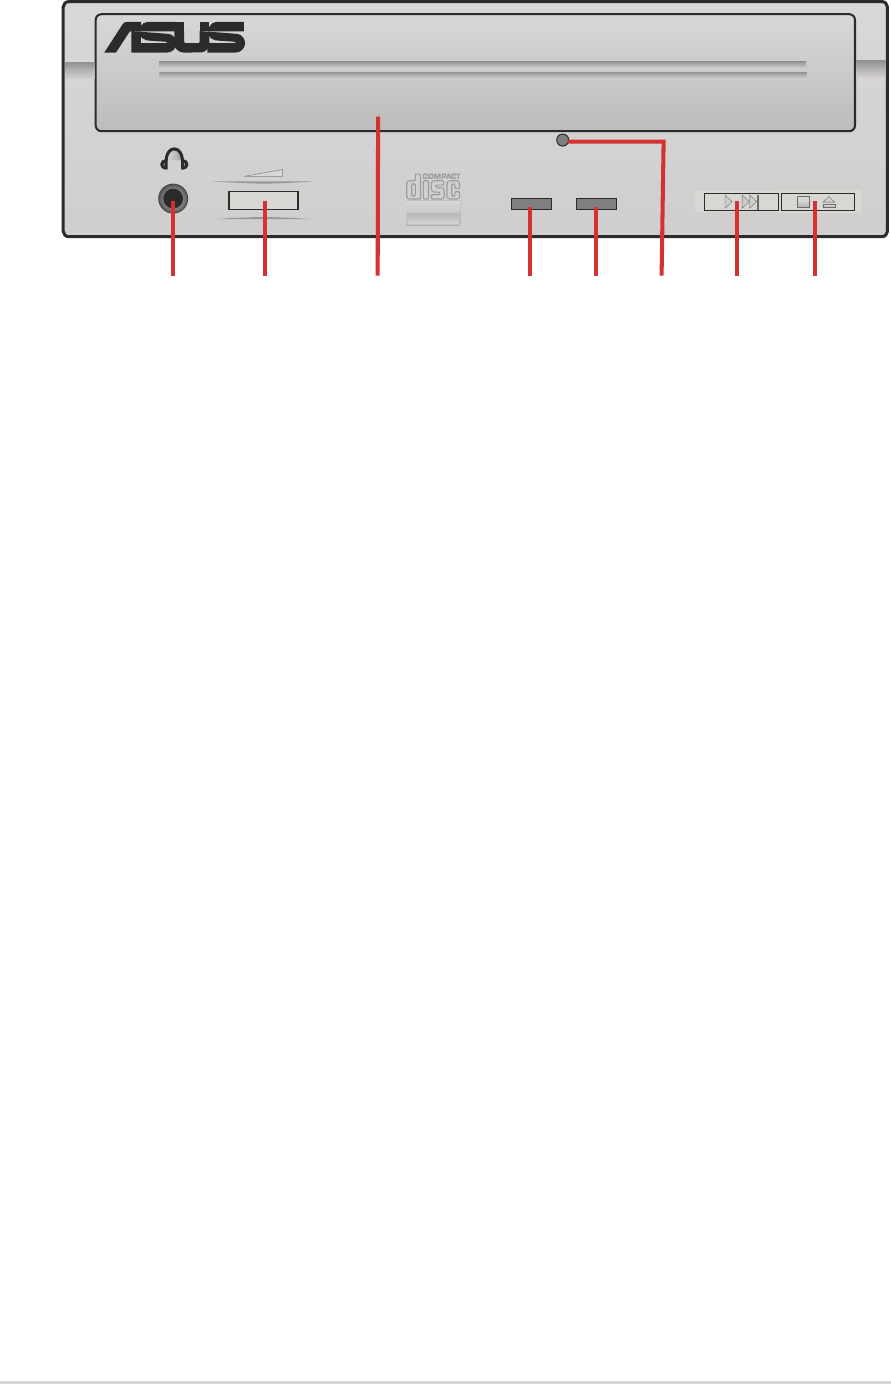
Front Panel
1. Headphone jack
This jack allows you to connect a headphone with a stereo mini-plug.
2. Headphone volume dial
This volume dial allows you to control the volume of the headphone
connected to the drive. Turning the dial to the left decreases the
volume, turning to the right increases volume.
3. Disc tray
This tray holds the disc.
4. WRITE indicator (Red LED)
This LED flashes while data is being written on the disc.
5. READ indicator (Green LED)
This LED turns ON when you place a disc on the drive tray, and stays
ON until you remove the disc. The LED flashes while data is being
read from the disc.
6. Emergency eject pinhole
In cases when you cannot eject a disc from the drive using the eject
button due to power failure or software problems, insert a pin or a
paper clip into this hole to manually eject the tray and the disc.
7. PLAY/SKIP button
This button has two functions. If the drive is idle, pressing this button
will start playing an audio disc (if one is currenly loaded in the drive)
from the first track. While in the PLAY mode, pressing this button lets
you skip to the next track on the disc.
8. STOP/EJECT button
This button has two functions. Pressing this button at any time ejects
the disc tray so you can place or remove a disc. While in PLAY mode,
pressing this button stops playing the disc loaded in the drive.
¤
Recordable
Recordable
Recordable
Rewritable
High Speed
12
48X24X52X
3 54
6
7 8
W
R


