


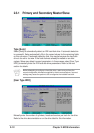

ASUS P4S8X-X motherboard user guide
2-7
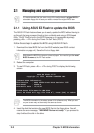
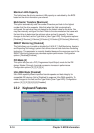
2.1.3 CrashFree BIOS 2 (BIOS Auto-recovery Procedure)
The CrashFree BIOS 2 feature allows users to boot the computer from a
floppy disk and update the BIOS using AFLASH.EXE or EZ Flash Utility in
case the original BIOS fails or gets corrupted. If the user doesn’t have a
bootable floppy disk with the original BIOS, an auto-recovery procedure
can be performed using the support CD.
It is strongly recommended to save a copy of the motherboard’s original
BIOS along with the AFLASH.EXE utility to a bootable disk.(See section
2.1.2 to create a bootable floppy disk)
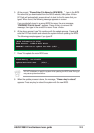
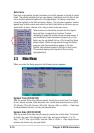
Using the support CD
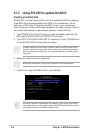
1. Boot using the support CD. The support CD will automatically detect whether
the BIOS is corrupted.
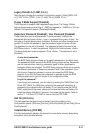
2. If the BIOS data or codes are corrupted, the message “The BIOS was
corrupted! Do you want to recover?”, appears.
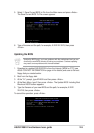
3. Press “Y”, to start auto-recovery procedure. If there is no keyboard input from
user, the system will perform BIOS auto recovery after 30 seconds.
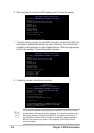
The recovered BIOS may not have the same version as original BIOS. Visit
ASUS website (www.asus.com) to download the latest BIOS for this
motherboard and update BIOS using ASUS AFLASH.EXE, ASUS EZ Flash
Utility or ASUS Live Update.
Using the created bootable floppy disk
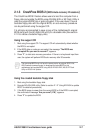
1. Boot using the bootable floppy disk.
2. Execute AFLASH.EXE utility (Refer to section 2.1.2 “Using AFLASH to update
BIOS” for detailed procedures)
3. If the BIOS image is newer than the current BIOS or if the BIOS is corrupted,
the confirmation message “Are you sure? (Y/N)”, appears.
4. Press “Y” to update the BIOS.