18 ASUS VX97 User’s Manual
III. INSTALLATION
3. Central Processing Unit (CPU)
The motherboard provides a 321-pin ZIF Socket 7 that is backwards compatible
with ZIF Socket 5 processors. The CPU that came with the motherboard should
have a fan attached to it to prevent overheating. If this is not the case then purchase
a fan before you turn on your system. Apply thermal jelly to the CPU top and then
install the fan onto the CPU.
WARNING: Without a fan circulating air on the CPU and heat sinks, the
CPU and/or heat sinks can overheat and cause damage to both the CPU and the
motherboard. (See "CPU Cooling Fan Connector” at the end of this section.)
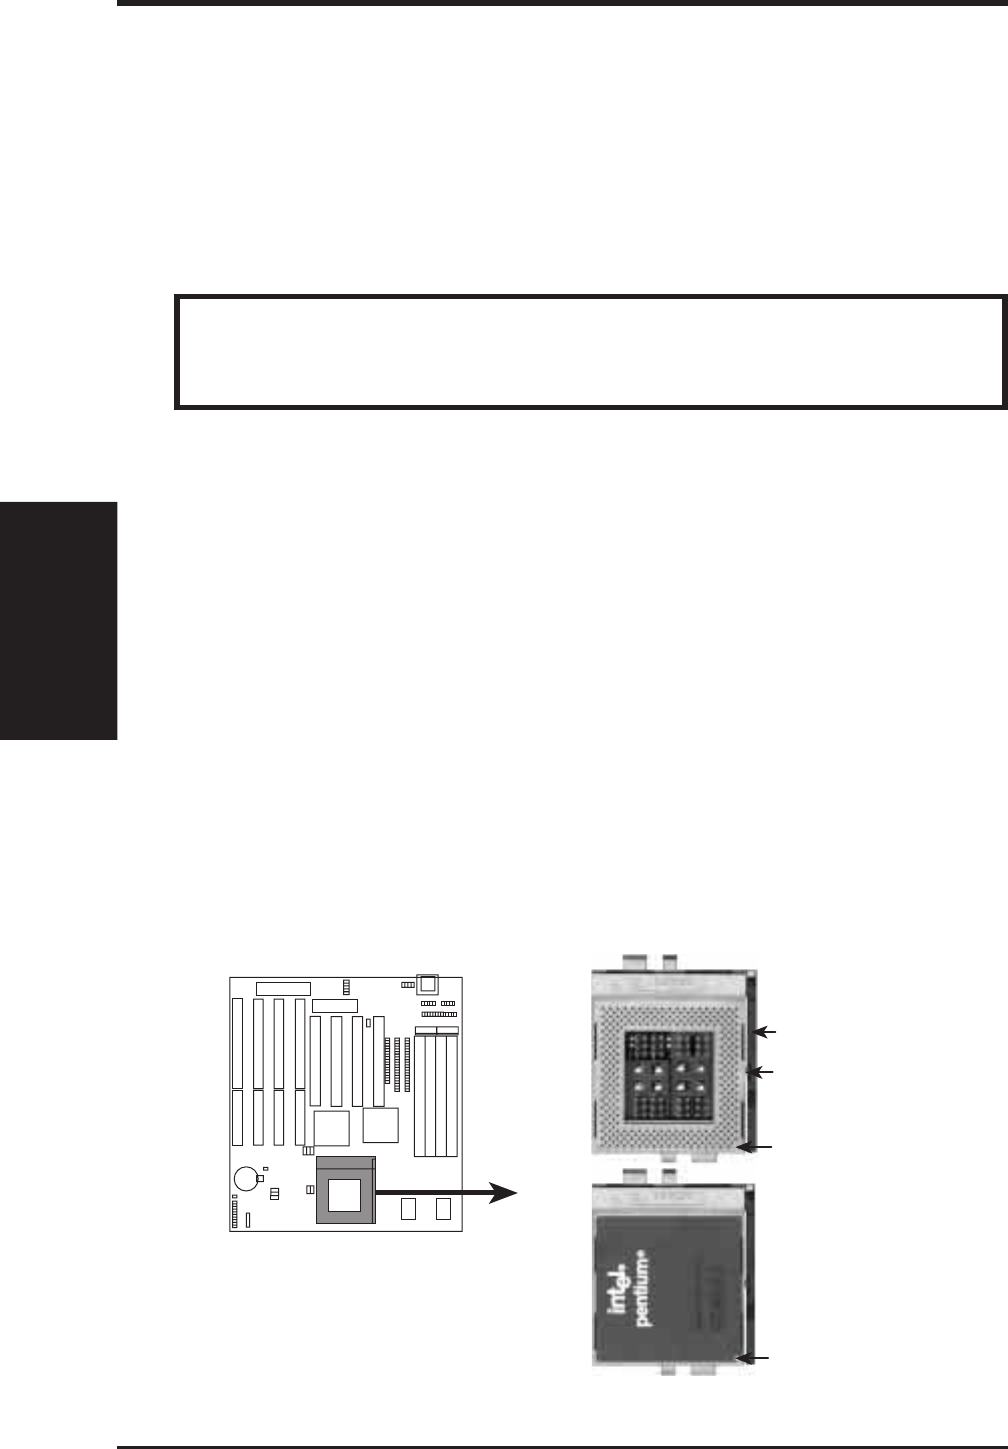
To install a CPU, first turn off your system and remove its cover. Locate the ZIF
socket and open it by first pulling the lever sideways away from the socket then
upwards to a 90-degree right angle. Insert the CPU with the correct orientation as
shown. Use the notched corner of the CPU with the white dot as your guide. The
white dot should point towards the end the of the lever. Notice that there is a blank
area where one hole is missing from that corner of the square array of pin holes and
a "1" printed on the motherboard next to that corner. Because the CPU has a corner
pin for three of the four corners, the CPU will only fit in the one orientation as
shown. The picture is for reference only; you should have a CPU fan that will cover
the face of the CPU. With the added weight of the CPU fan, no force is required to
insert the CPU. Once completely inserted, hold down on the fan and close the
socket's lever.
IMPORTANT: You must set jumpers for "CPU to BUS Frequency Ratio" and
jumpers for "BUS Frequency Selection" depending on the CPU that you install.
Blank
Lever
Lock
White Dot
ZIF Socket 7 with
Pentium Processor
Installed CPU
Example
(CPU)
III. INSTALLATION


