WARNING
To minimize the risk of potential safety problems, you should follow all applicable local and national codes that regulate the installation
and operation of your equipment. These codes vary from area to area and it is your responsibility to determine which codes should be
followed, and to verify that the equipment, installation, and operation are in compliance with the latest revision of these codes.
Equipment damage or serious injury to personnel can result from the failure to follow all applicable codes and standards. We do not guarantee the
products described in this publication are suitable for your particular application, nor do we assume any responsibility for your product design,
installation, or operation.
If you have any questions concerning the installation or operation of this equipment, or if you need additional information, please call Technical
Support at 770-844-4200.
This publication is based on information that was available at the time it was printed. At Automationdirect.com
®
we constantly strive to improve
our products and services, so we reserve the right to make changes to the products and/or publications at any time without notice and without
obligation. This publication may also discuss features that may not be available in certain revisions of the product.
2
w w w . a u t o m a t i o n d i r e c t . c o m
1 - 8 0 0 - 6 3 3 - 0 4 0 5
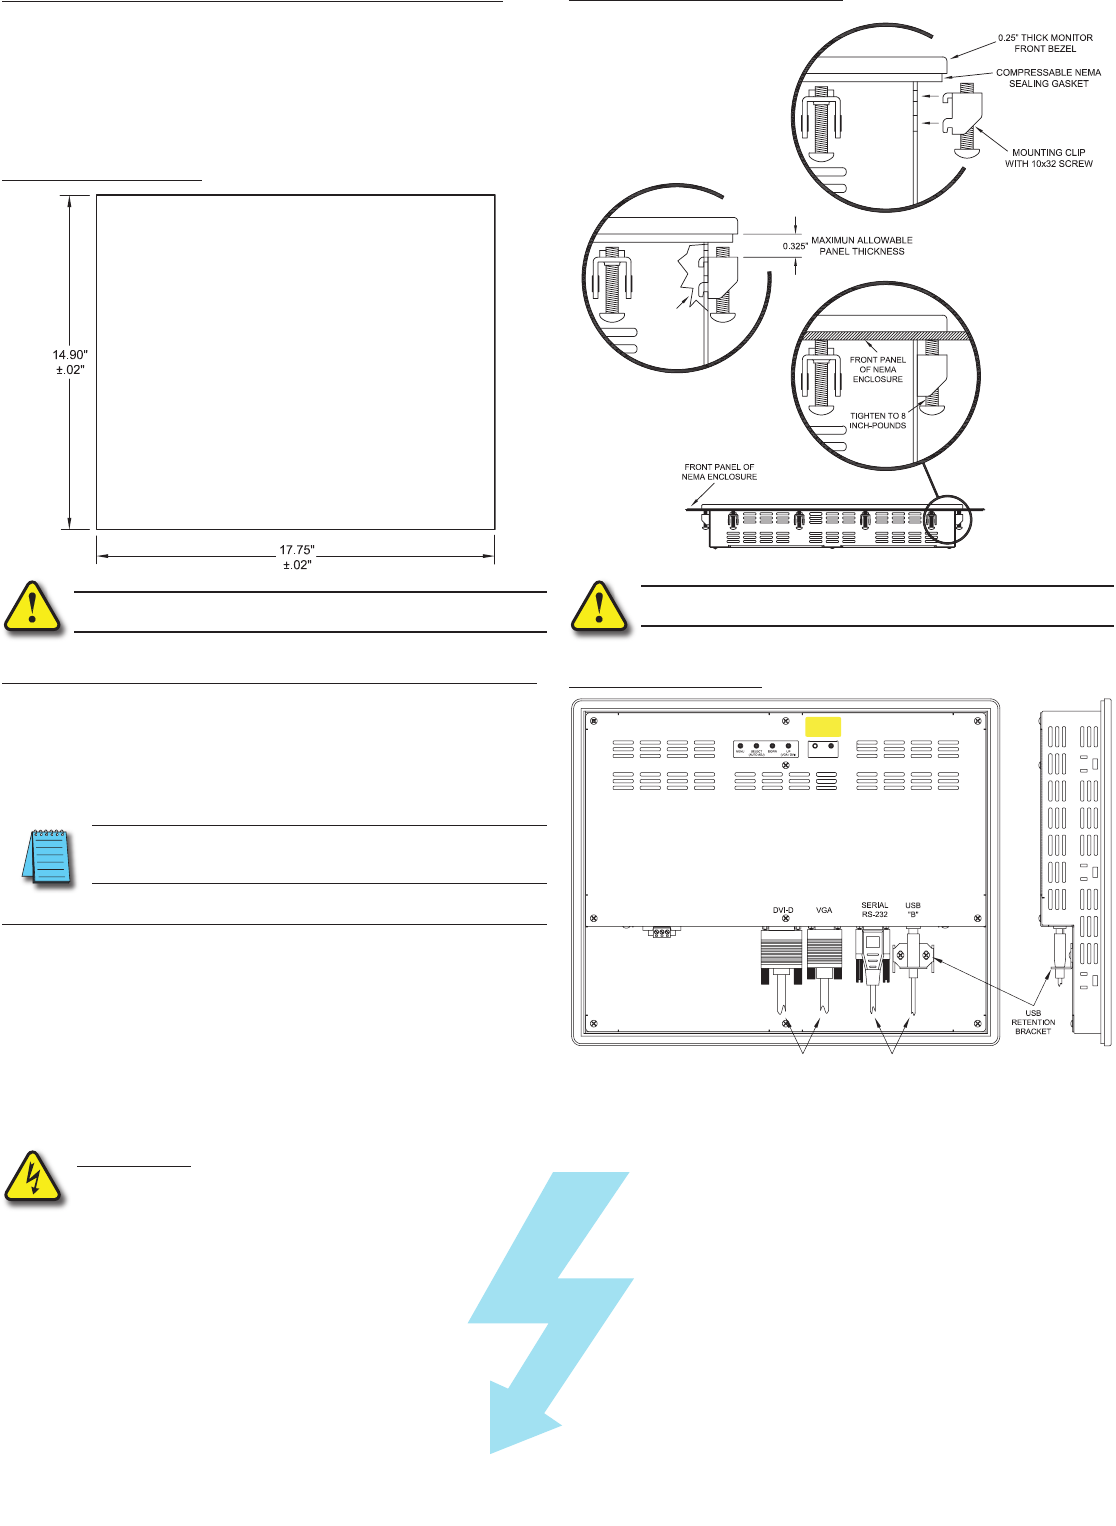
WARNING: Damage can occur by applying excessive torque to the
mounting clips.
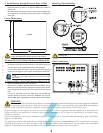
2. Install Monitor through Enclosure Door or Wall
• Use dimensions as shown in the diagram below to provide a
rectangular mounting cutout in an approved NEMA 4/12 enclosure’s
door or wall.
• Mount the monitor through the enclosure cutout, install and tighten (14)
mounting clips to a torque of 8.0 inch-pounds as shown in the diagram
to the right.
CUTOUT
Cutout Dimensions:
CUT AWAY
VIEW
Mounting Clip Installation:
WARNING: An operating temperature of 0 to 50 °C (32 to 122 °F)
needs to be maintained for proper operation of the monitor.
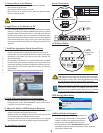
* NOTE: USE ONE OR THE
OTHER, NOT BOTH.
TOUCH SCREEN
CABLES *
VIDEO CABLE *
DISPLAY POWER
WARNING
T
ouch Screen is still
a
ctive while display
power is off
Cable Connections:
3. Connect DVI or VGA Video Cable between Monitor & PC
• Connect the included 6’ VGA video cable from the video connector on
the monitor to the video output connector on the host PC being used
with the monitor or use a digital DVI-M cable (sold separately).
• If using a DVI-D cable, then special instructions apply when applying
power; see warning to the right in regards to selecting the video input.
4. Connect USB or Serial Cable between Monitor & PC
• Applies to ATM1900T touch screen version only.
• Use either the included 6’ RS-232 Serial touch screen cable or the 2m
USB touch screen cable from the appropriate connector on the monitor
to the appropriate connector on the host computer; do not connect
both.
• If using the USB cable, secure the cable using the included USB
retention bracket and screw; consult the Hardware User’s Guide,
ATM-19-USER, on the supplied Documentation and Drive CD for details.
NN
OOTTEE
::
T
HE 19” MONITOR WILL PRODUCE THE BEST IMAGE QUALITY IF
THE PC IS SET FOR A 1280 X 1024 PIXELS @ EITHER 60, OR 75 HZ.
VIDEO MODE.


