


Installation
AT&T Plug&Share
™
Wireless PCI Adapter 108 Mbps 6550G 4
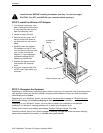
1 Turn off and unplug your com-
puter. Following the instructions
in your computer user manual,
open the computer cover.
2 Locate an empty PCI slot.
3 Remove the slot cover. You’ll
have to remove the screw or
clip that holds the slot cover in
place.
4 Carefully insert the wireless
PCI adapter into the PCI slot.
You may have to use firm pres-
sure, but do not force the
adapter in. If you experience
problems installing the PCI
adapter, try another slot.
5 Replace and tighten screws,
then replace the computer
cover.
6 Plug your computer back into
the AC outlet, then restart your
computer.
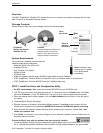
Install software BEFORE installing the adapter (see Step 1 on previous page).
CAUTION: Turn OFF and UNPLUG your computer before opening it.
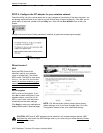
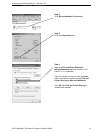
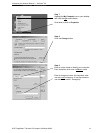
STEP 3: Recognize the Hardware
Depending on the Windows
®
operating system version running on your computer, one of several screens
may appear to inform you that the computer recognizes new hardware. Choose to install the software
automatically and click Next.
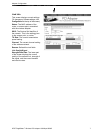
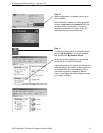
Depending on your Windows
®
version, you may see a Hardware Alert message or a Digital Signature
Not Found message. Click Continue Anyway or Yes to complete the installation.
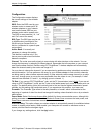
Depending on your Windows
®
version, you may have to restart your computer to complete the
installation. If a Windows
®
message prompts you to restart your computer, do so.
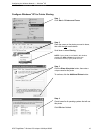
Finally, some versions may display the message Systems Settings Change. Click Yes.
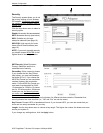
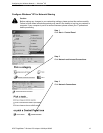
Check the indicator light to verify that the adapter is working: The light will remain on when receiving
power and connected to the network. It will blink during data transfer.
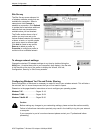
STEP 2: Install the Wireless PCI Adapter
Wireless PCI
adapter
PCI slots
Adapter indicator light