


Installation
The VAP2500 enables you to transmit multiple standard- and high-definition video
streams throughout your home wirelessly. You can enjoy a full range of video services and
applications without having to run wires, lay cables, or drill holes.
The U-verse Wireless Access Point operates
only
with authorized U-verse Wireless
Receiver(s).
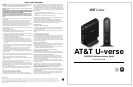
Front Panel
Power Green = Power is on
Off = Power is disconnected from its power source
Paired Blinking orange = WPS button has been pushed and pairing is in progress
Solid Green = At least one wireless receiver has been paired
Flashing Green = At least one wireless receiver is paired and wireless
activity is detected
Off = No wireless association
Link Solid Green = Ethernet link is detected
Blinking Green = Ethernet link is detected and wired activity is present
Off = Ethernet link is not detected
WPS WPS button
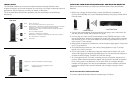
Rear Panel
Reset Button Resets the VAP2500 to its default settings
Ethernet
Port
Connects to the Ethernet-equipped U-verse
Residential Gateway
Power
Connector
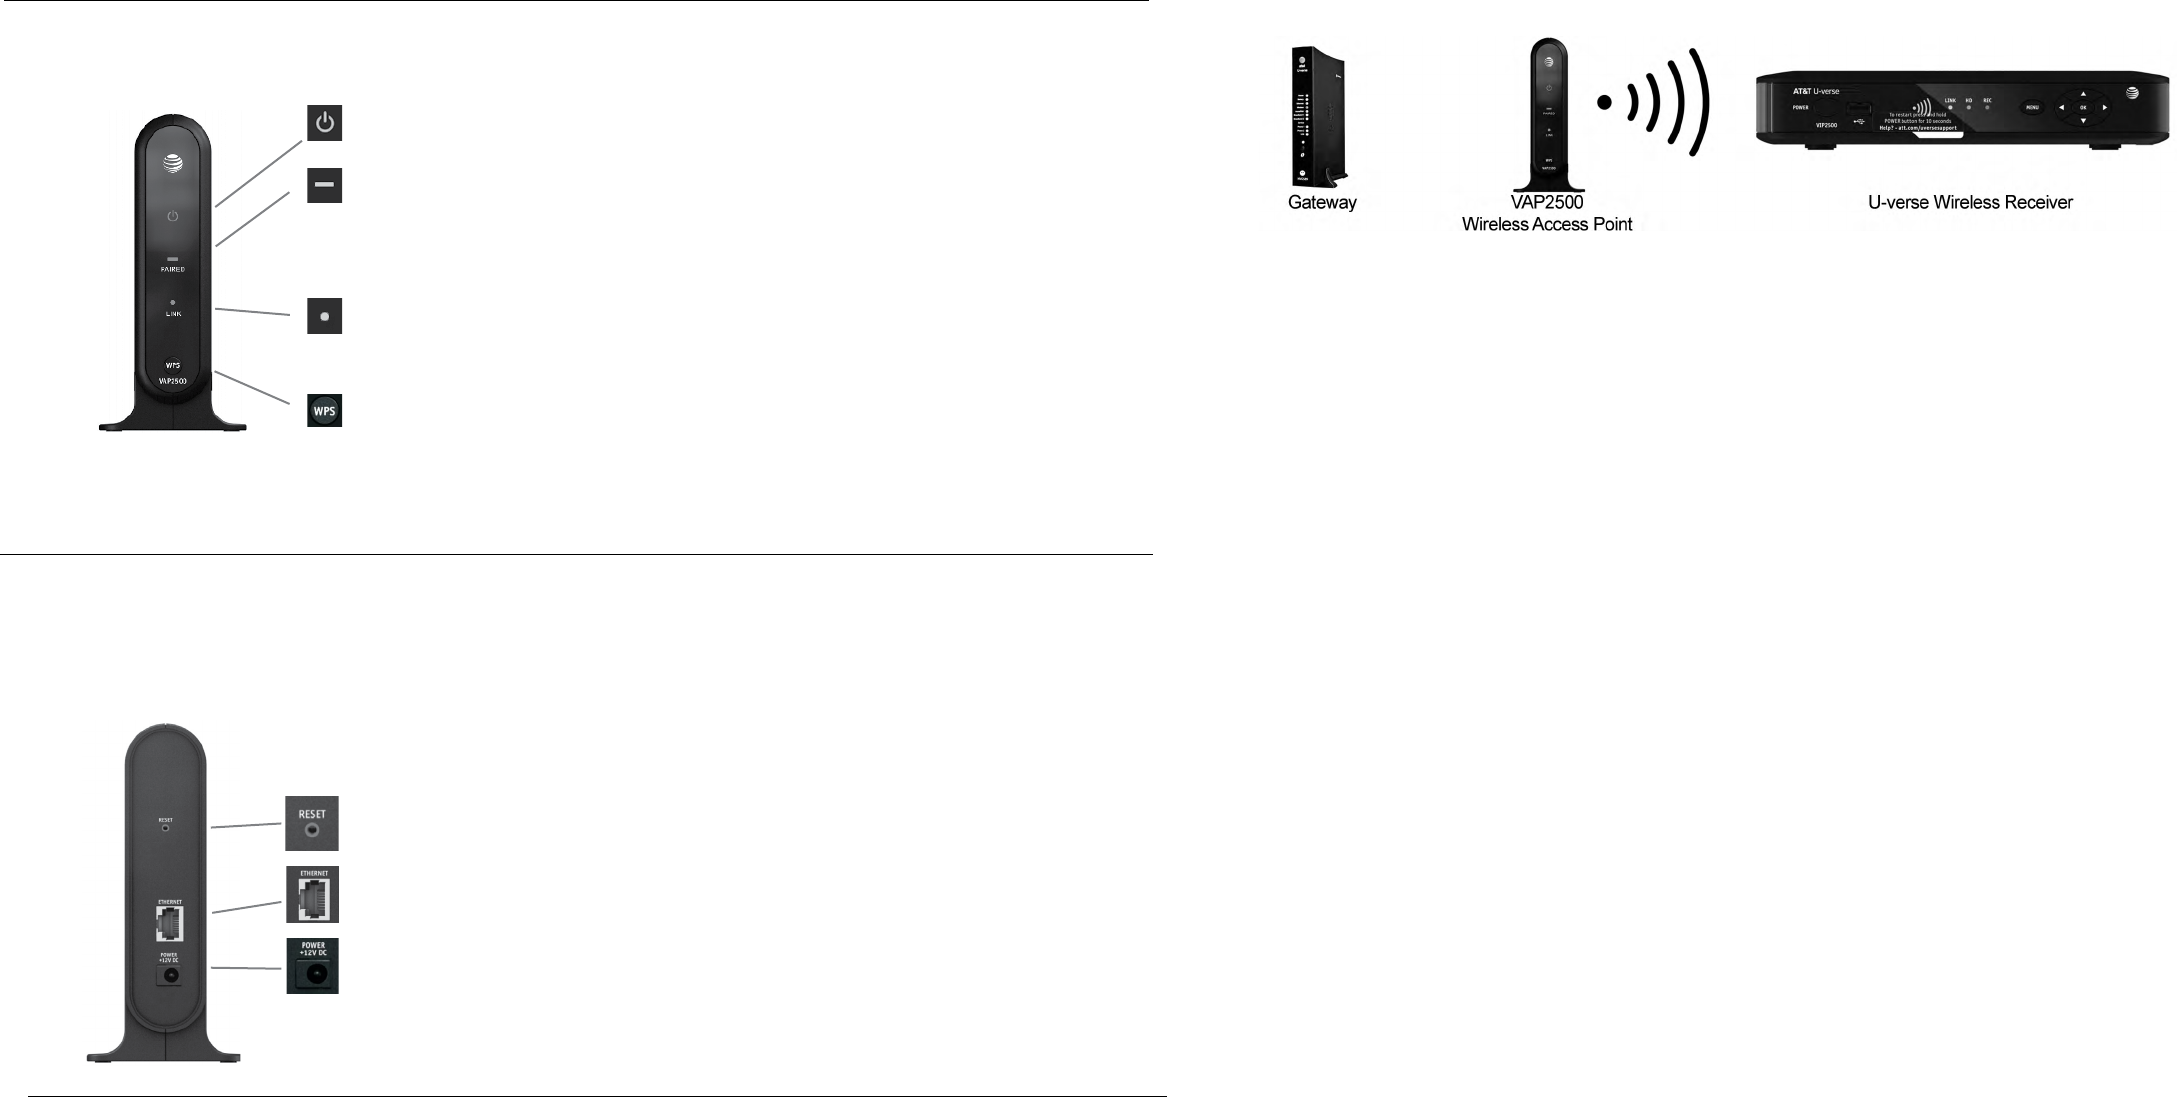
Installing Your Wireless Access Point AND WIRELESS RECEIVER
Follow the instructions below to install your Wireless Access Point and Wireless
Receiver.
1. Before you connect the Access Point, ensure the Gateway is powered on.
Connect one VAP2500 unit to your Residential Gateway using the provided yellow
Ethernet cable.
2. Connect the power adapter to the Access Point and plug it into a wall outlet. You
will see the unit’s Power and Ethernet LEDs go on.
3. Connect the cord from the DC Power Adapter to the POWER connector on the
rear of the Receiver, and plug the adapter into an AC wall outlet, and then connect
the Receiver to your TV. (For more details on connecting your Receiver to your TV,
refer to your TV user manual.)
4. When power is applied to the Receiver; the Power button lights green. Ensure that
your TV is powered on.
5. Once the Receiver powers on, wait until a prompt appears on your TV screen
asking if you wish to connect.
6. On the front panel of the Receiver, press and release the OK button. Go to the
Access Point and press and hold the WPS button for two seconds then release to
activate the WPS process. The WPS LED will blink orange.
7. An icon appears on the TV screen, indicating that the connection sequence is in
process. When three horizontal dots appear, the connection has been successful.
On the front panel of the Receiver, two or more LEDs on the Signal Strength
indicator will light green. You have now established a secure wireless connection
between the Access Point and the Receiver and can begin enjoying U-verse
service.
Installing Additional Wireless Receivers
To connect additional Wireless Receivers repeat steps 3-7 above.