


Page 2 of 12
Rev. B 3/00
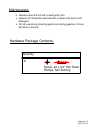
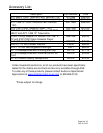
Contents:
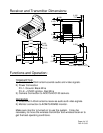
1) WOS500T Transmitter
2) WOS500R Receiver
3) Power Harness with Locking Connector
4) Hardware Package
Before Installation:
• This system operates on 12 Volts DC only, negative ground
• For maximum operating range, try to minimize the number of
obstacles between the transmitter and receiver units.
• This system broadcasts high-quality audio and video, using
directional antennas that must be orientated in certain
configurations for best results. The flat-pitted faces on the
receiver and transmitter have antenna which have been designed
to face each other.
• This system is NOT waterproof, and should not be used in a wet
or high humidity environment as this can cause system damage
or electrical shock.
• Do not stand on this product, or place things on this product.
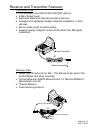
Installation Instructions:
TRANSMITTER
1) Insert the power harness connector provided into the DC IN
socket on the rear panel.
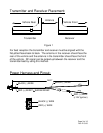
2) Position the transmitter near the camera and mount using four of
the provided screws. Flat-pitted face should be facing toward the
front of the vehicle. See figure 1.
3) Connect the cable of the transmitter and camera.
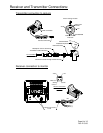
RECEIVER
1) Position the receiver near the monitor and mount using the
remaining four provided screws. Flat-pitted face should be facing
toward the rear of the vehicle. See figure 1.
2) Connect the cable of the receiver to CA1 or CA2 of the monitor.